Packaging Best Practice

Sundt Intune MDM Set-Up Guide

This document shows the process of how to set up an iPhone or iPad with Sundt’s Mobile Device Management system, Intune. This document is for devices that are not being restored from a different iPhone or iPad.

Instructions:

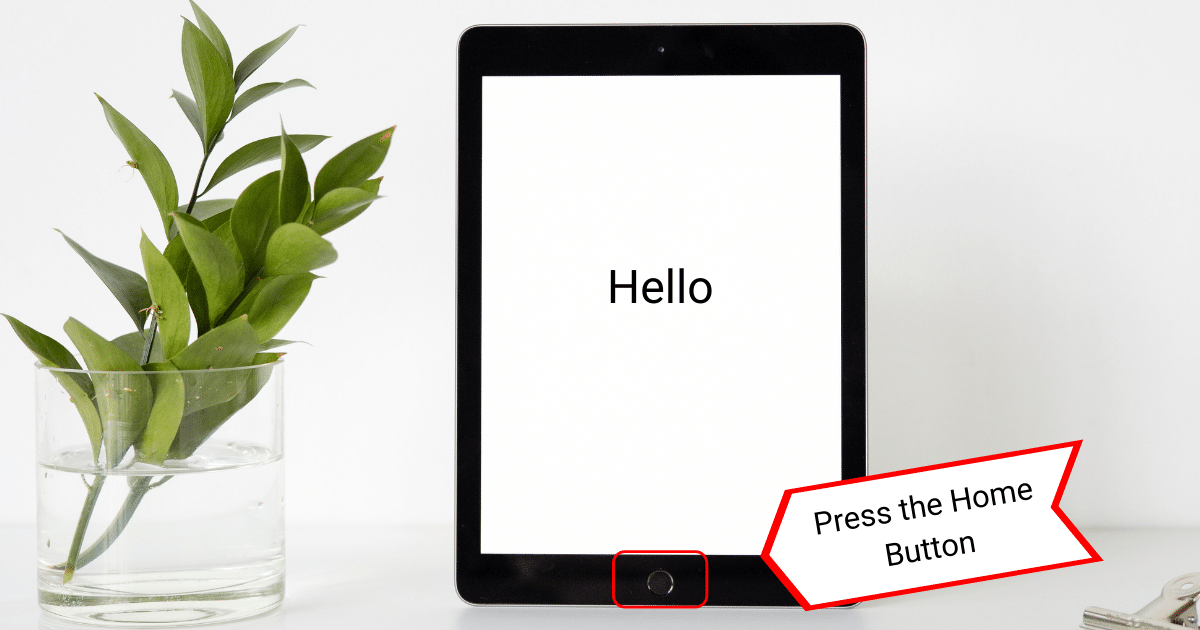
  1. Turn on the device by pressing the Home button.


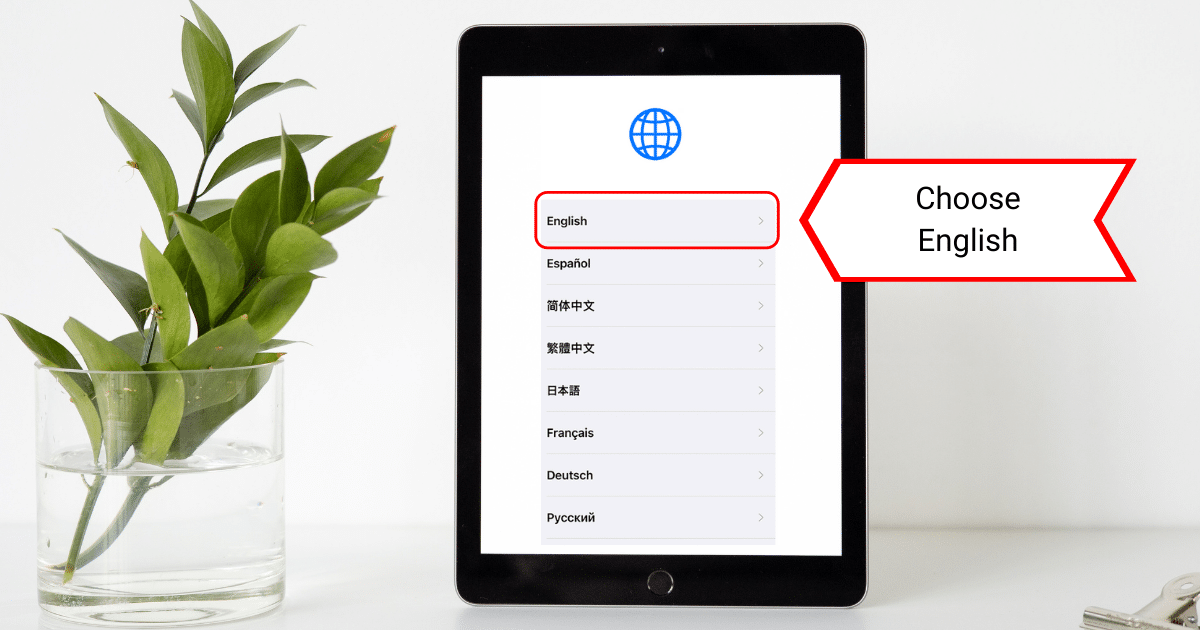
2. Choose your language.


3. Choose your country.


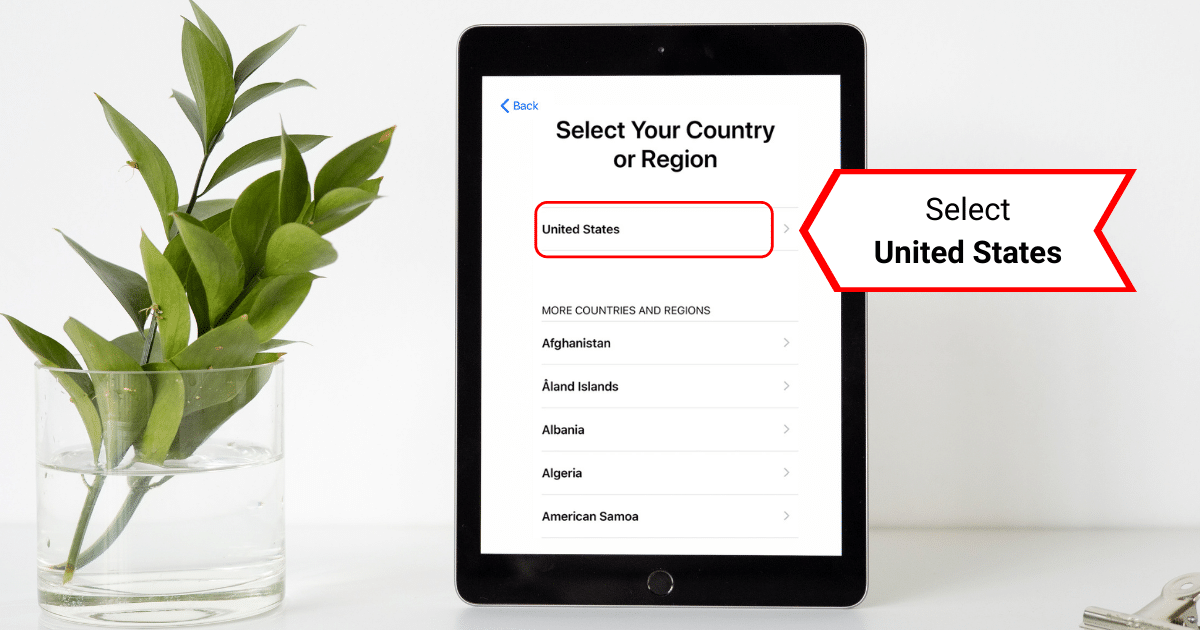
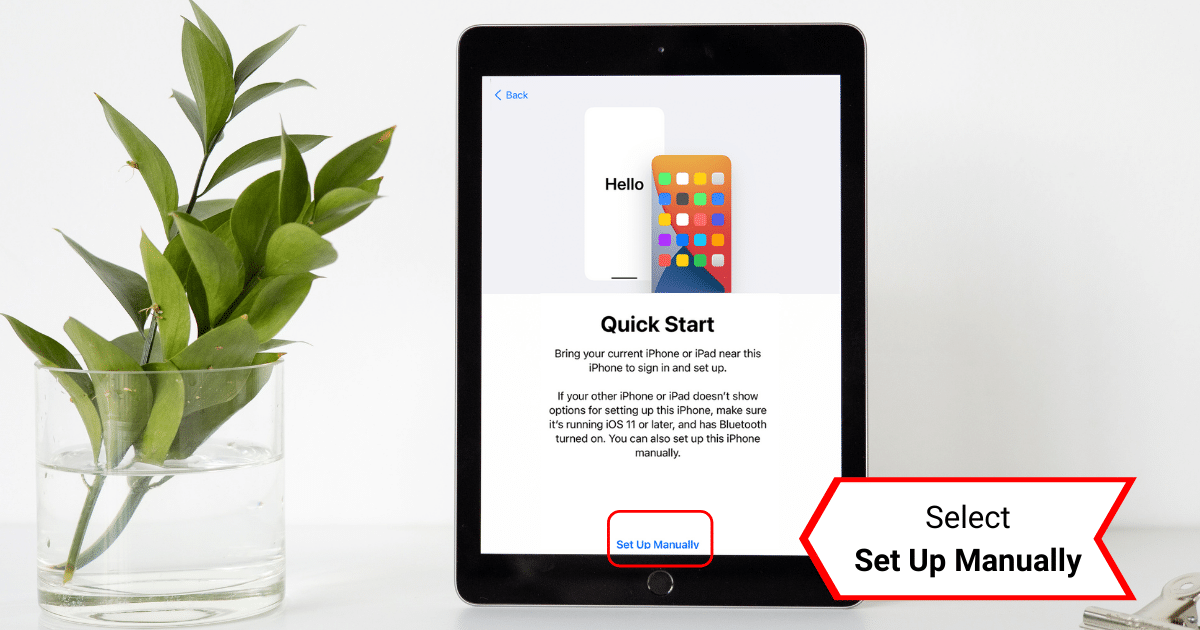
4. For Quick Start, select Set Up Manually (at the bottom of the screen).


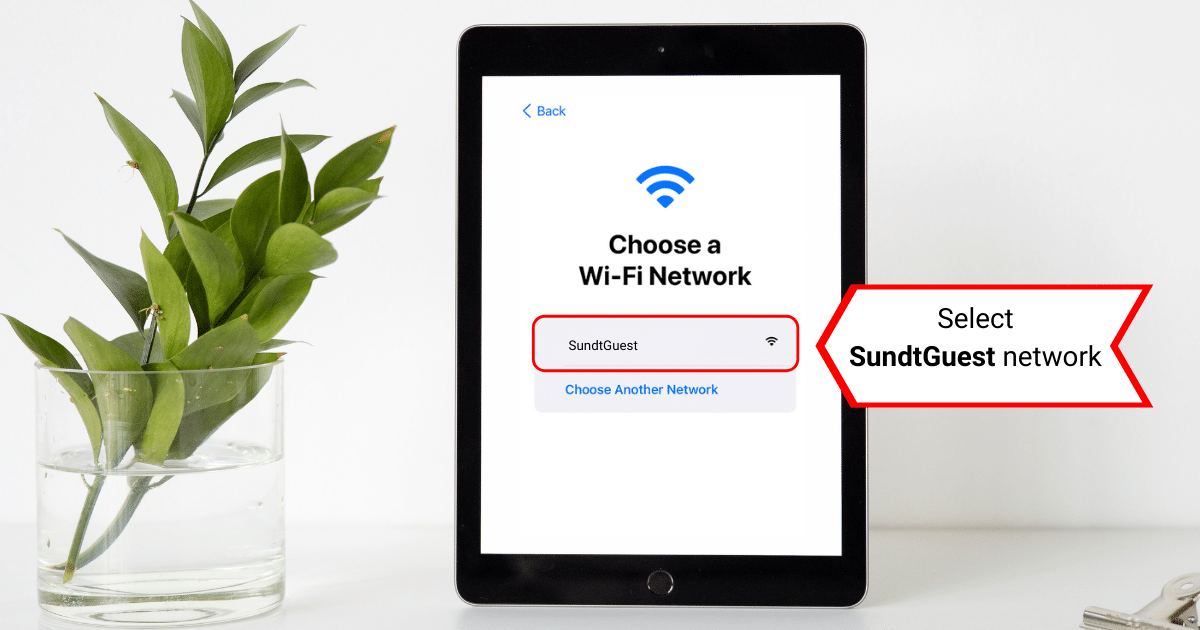
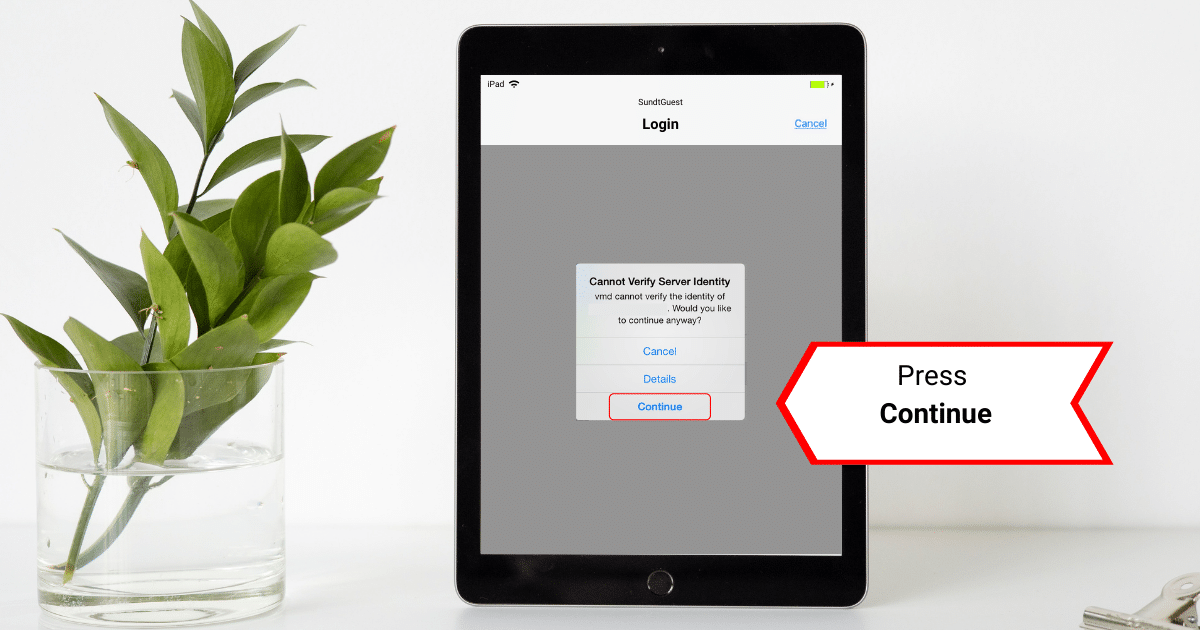
5. For Choose a Wi-Fi Network, select the SundtGuest network.

For Cannot Verify Server Identity, press Continue.

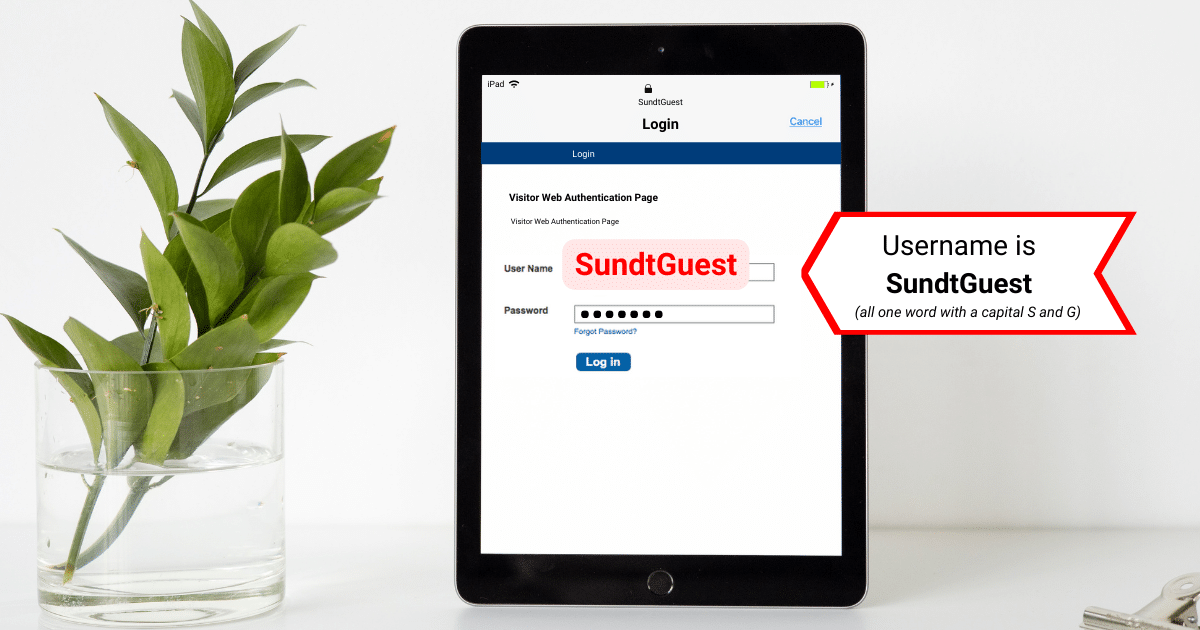
6. The username is SundtGuest (all one word with a capital S and G).

For the password, direct the user to SundtWeb, our internal website. At the bottom of the page, they will find the updated password. Enter the username and password, then press Submit. Once successfully connected you will see a ‘success’ message, then tap Done.


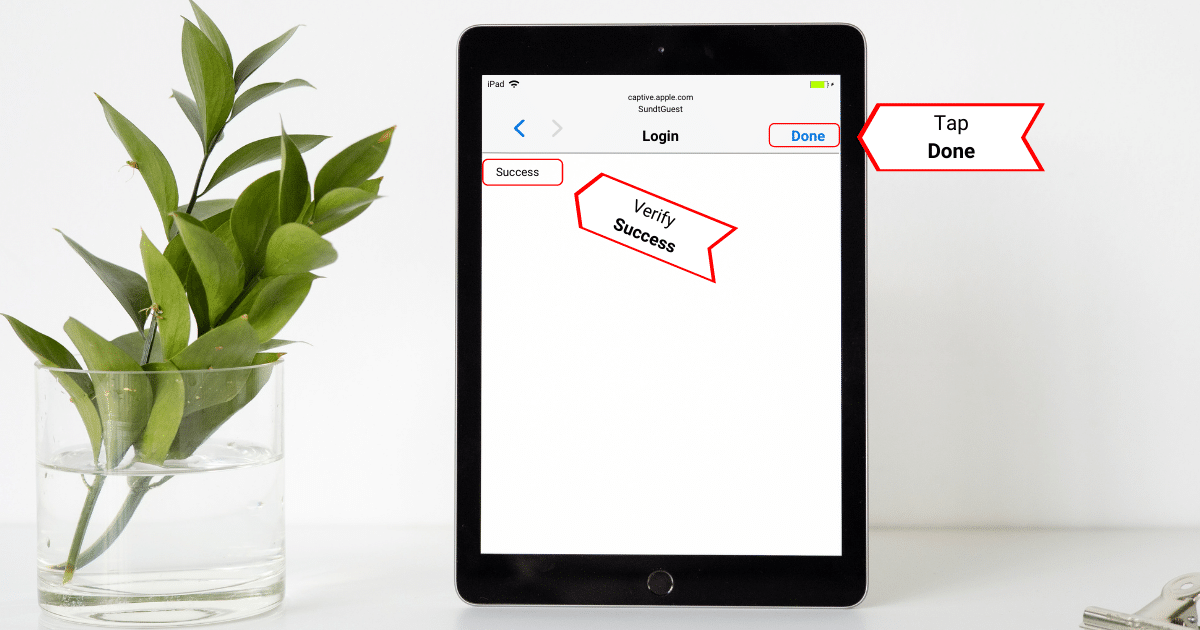
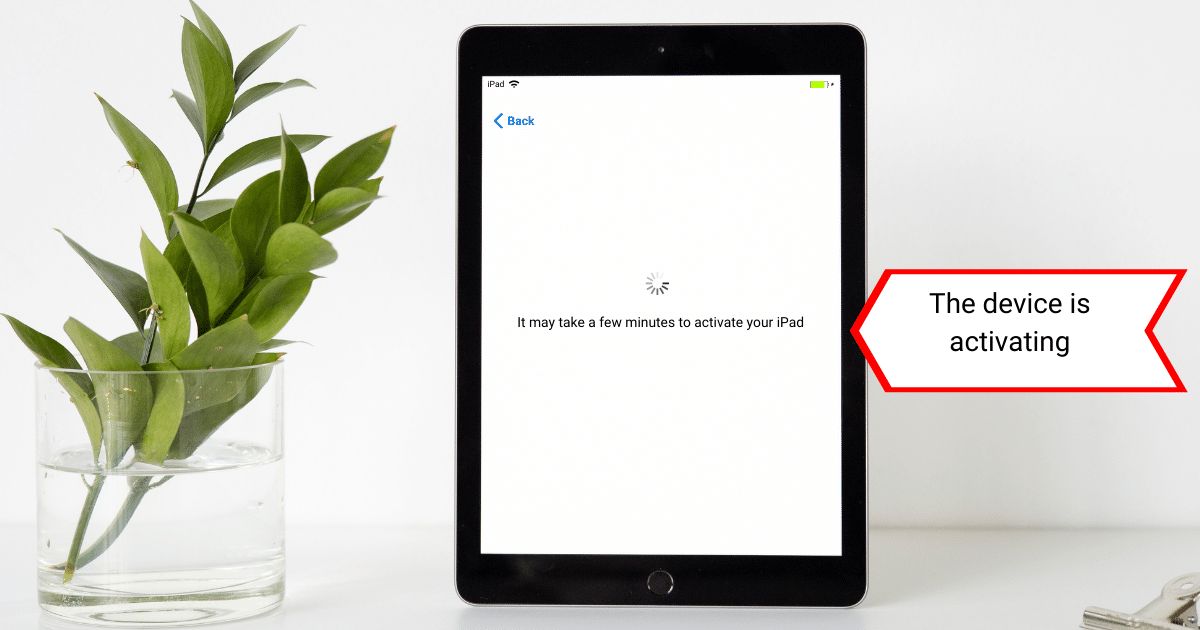
The device will begin to activate.


7. For Data & Privacy, choose Continue.


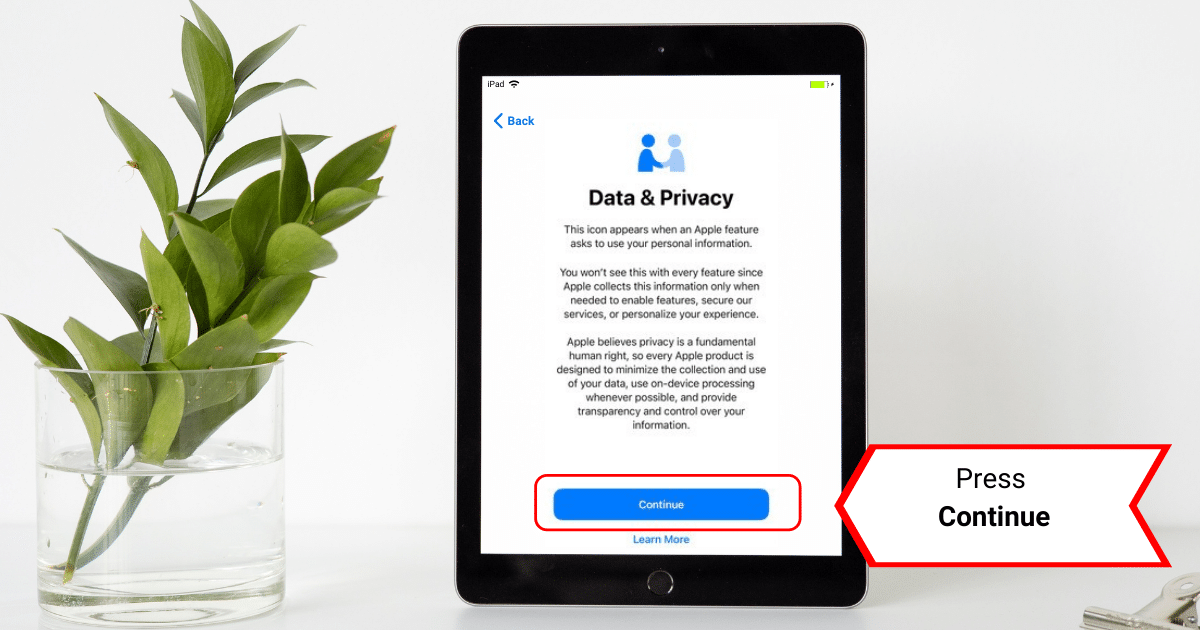
8. For Apps & Data (new devices only), select “Set Up as New iPhone/iPad”.


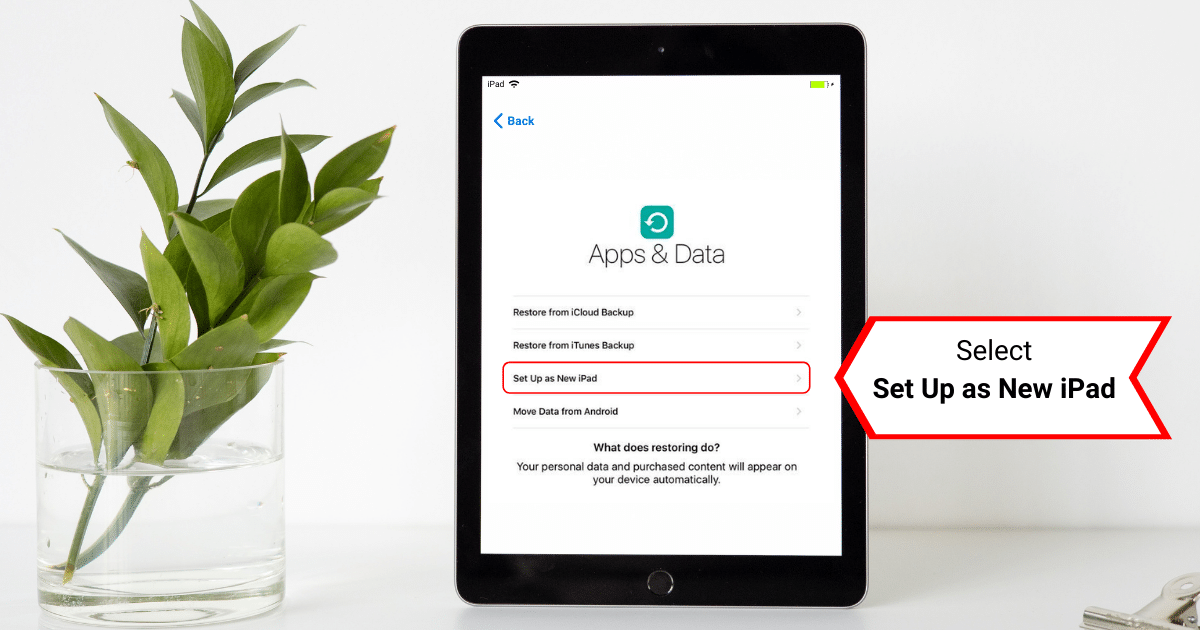
9. For Remote Management, tap Next.


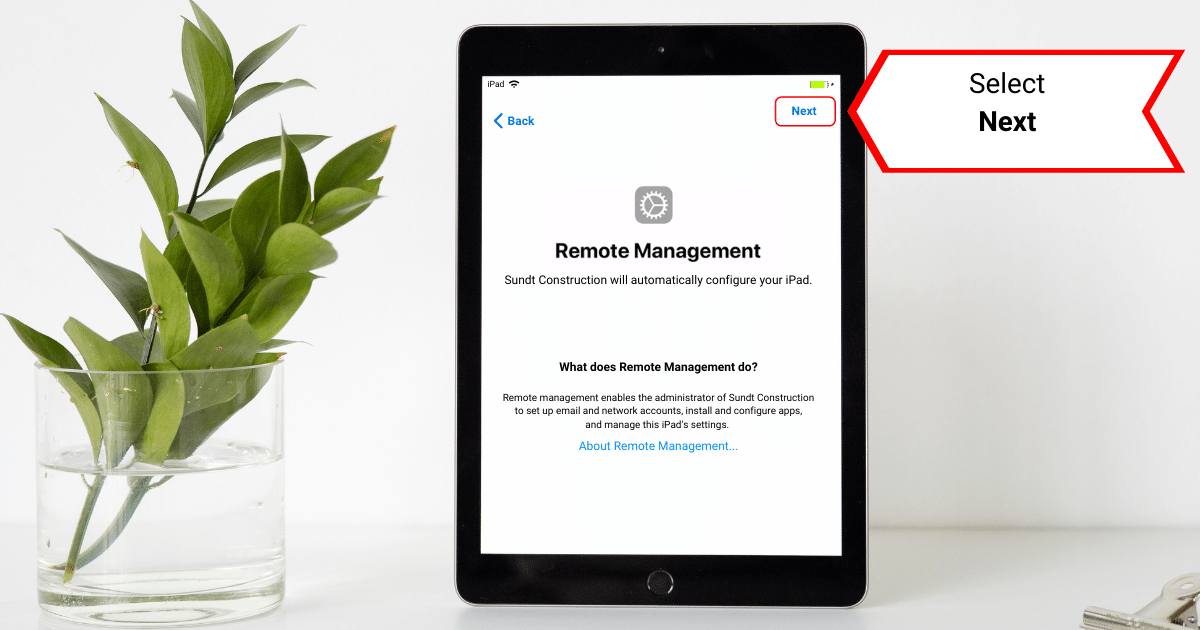
10. Create a 4-digit Passcode (you may be asked to re-enter the passcode as a verification). Click through the next few screens hitting Next or Continue until you come to the Welcome Screen. 


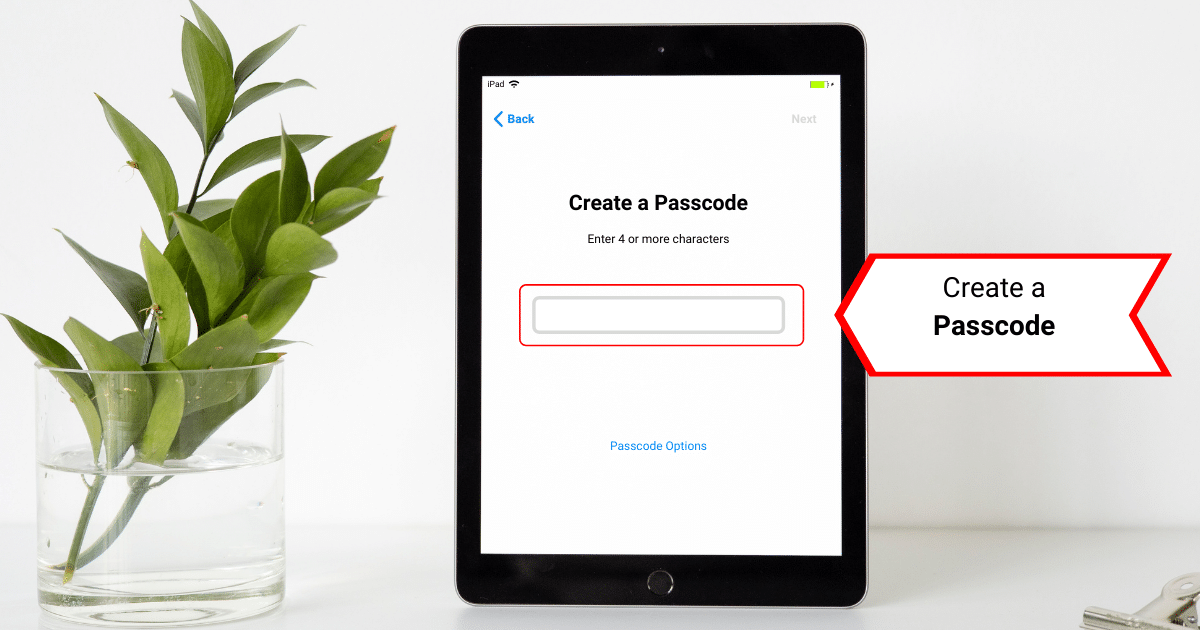
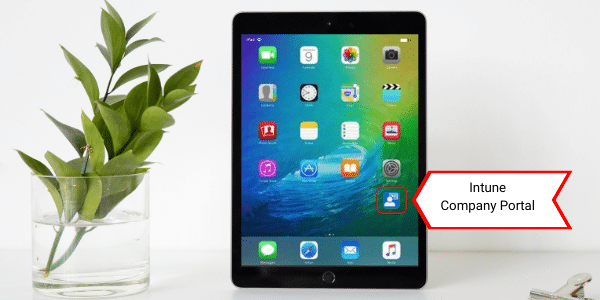
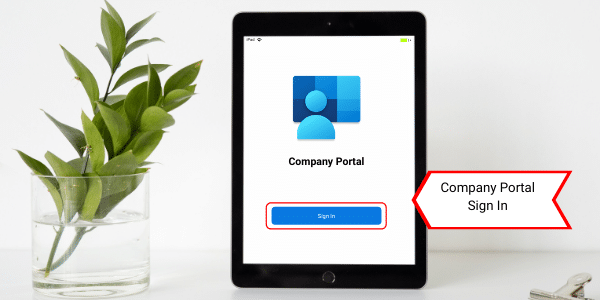
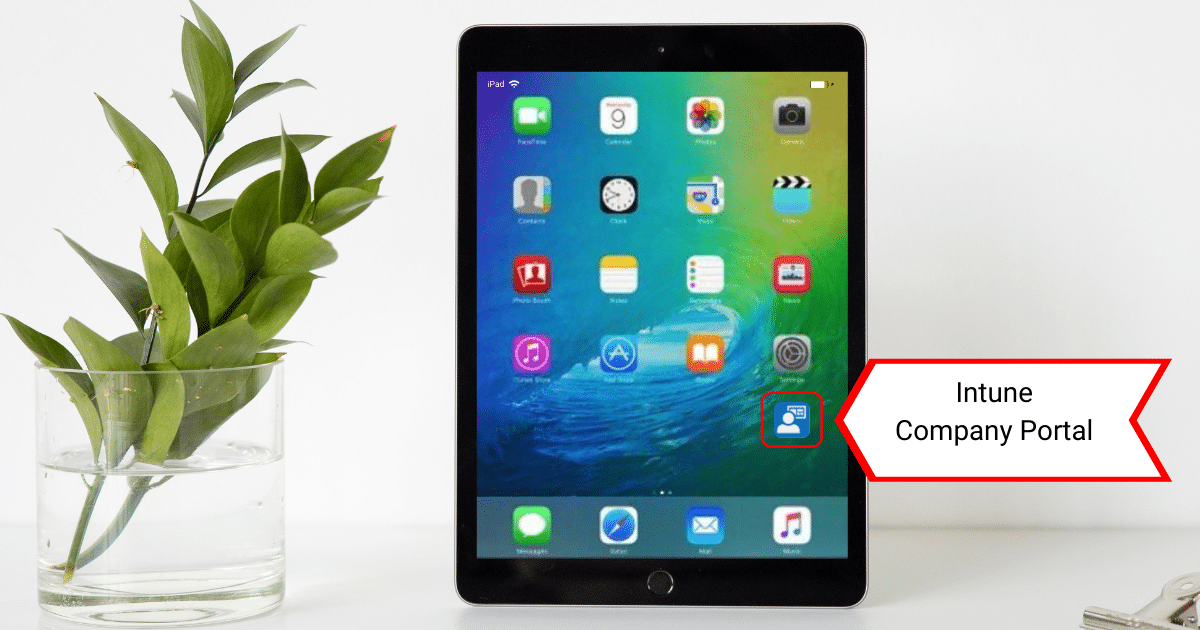
11. At the Welcome screen, select Get Started. Then login to the Intune Company Portal app to get Wi-Fi and other profiles set up.


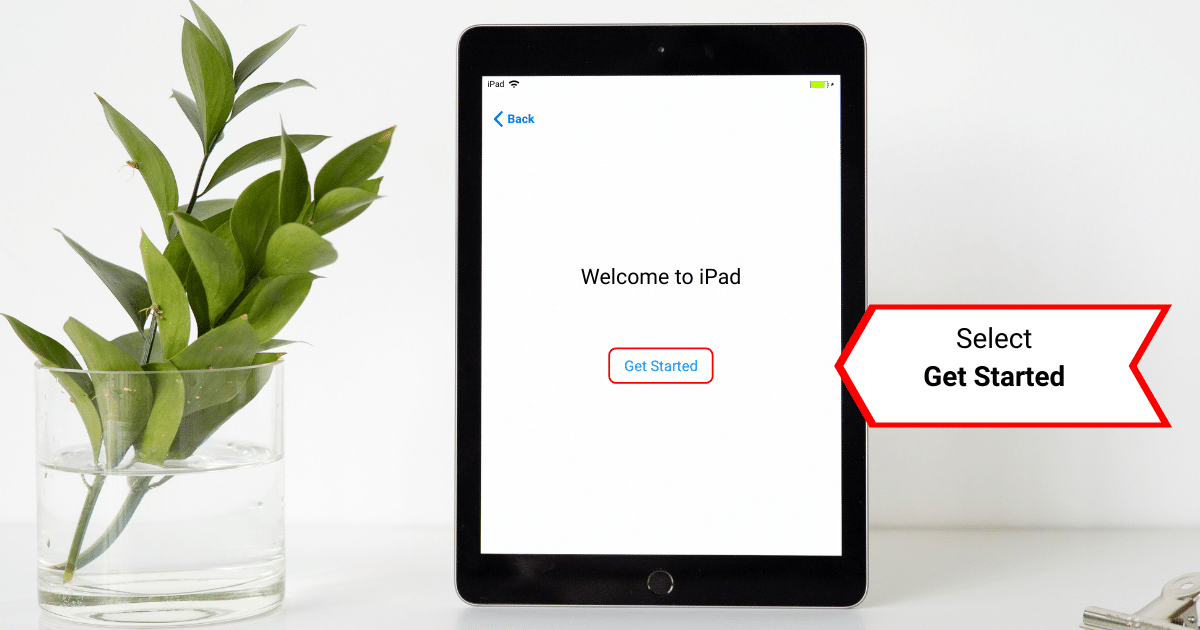
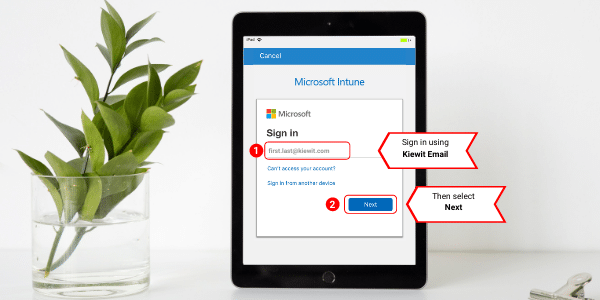
12. At the Microsoft Intune Sign In screen, use your Sundt Email Address then tap Next.

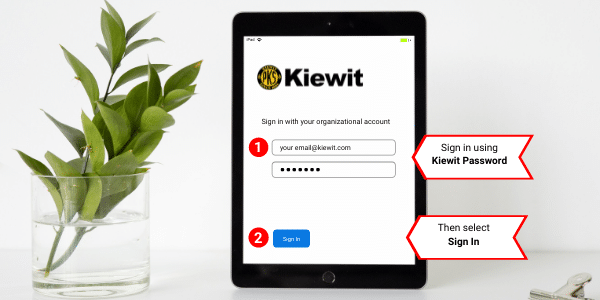
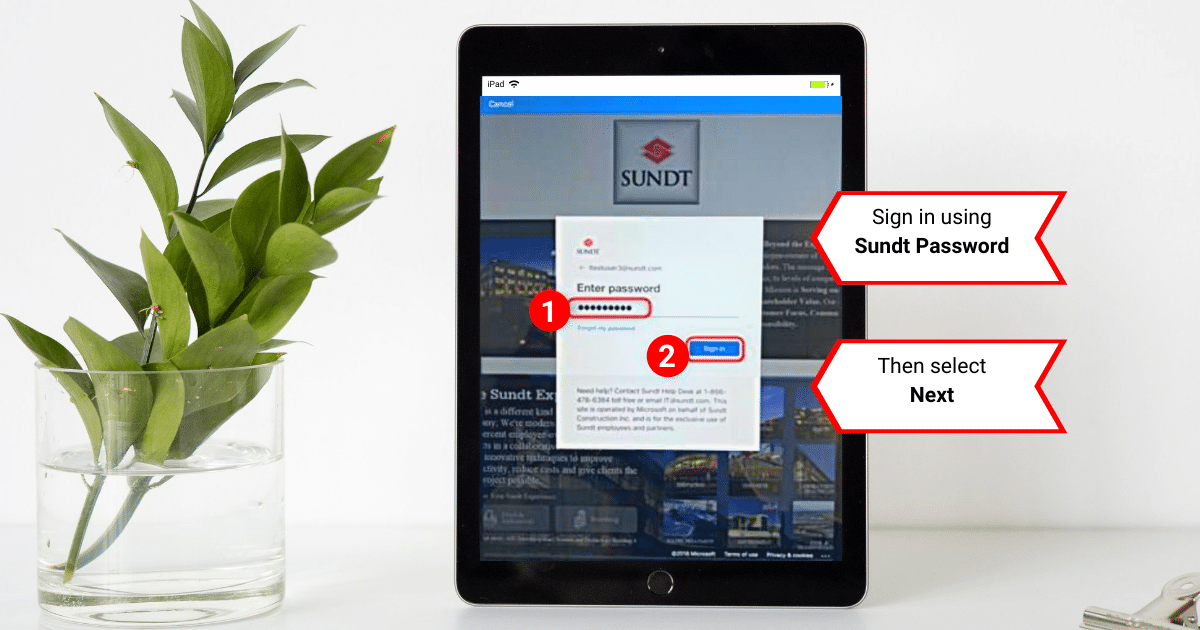
Enter Sundt password, then tap Sign In. If you are unable to sign in the first time, please try again. If you experience any other failures, please contact IT@sundt.com for assistance.


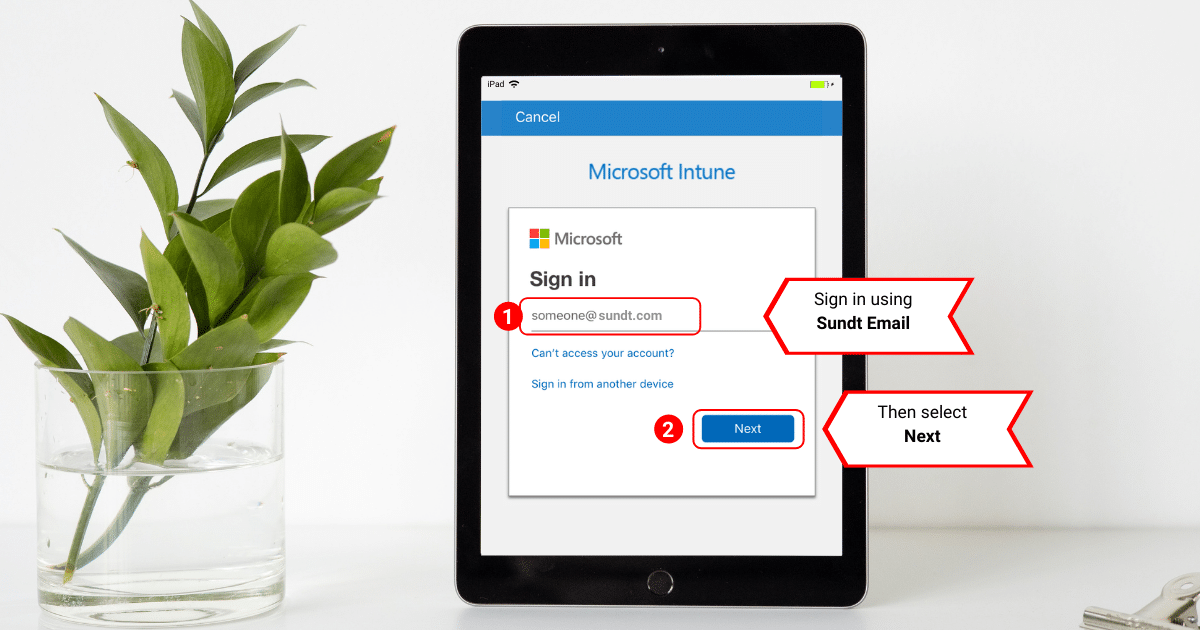
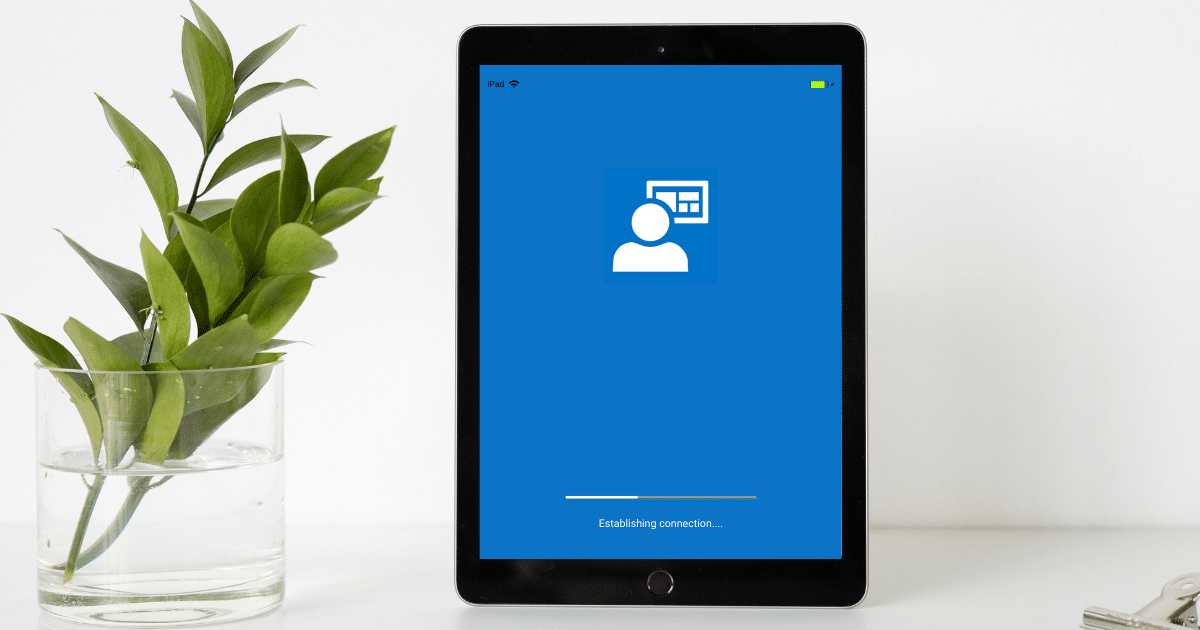
The Intune Company Portal app will start the process of registering the device.


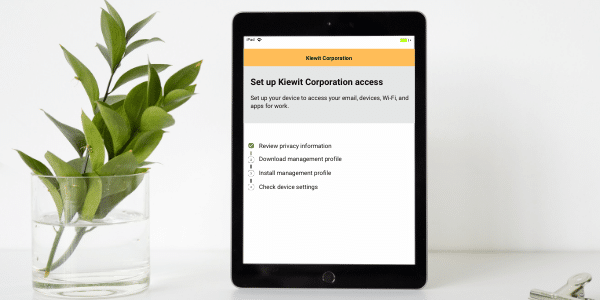
13. At the Set up Sundt Construction Inc. access screen, tap Begin.


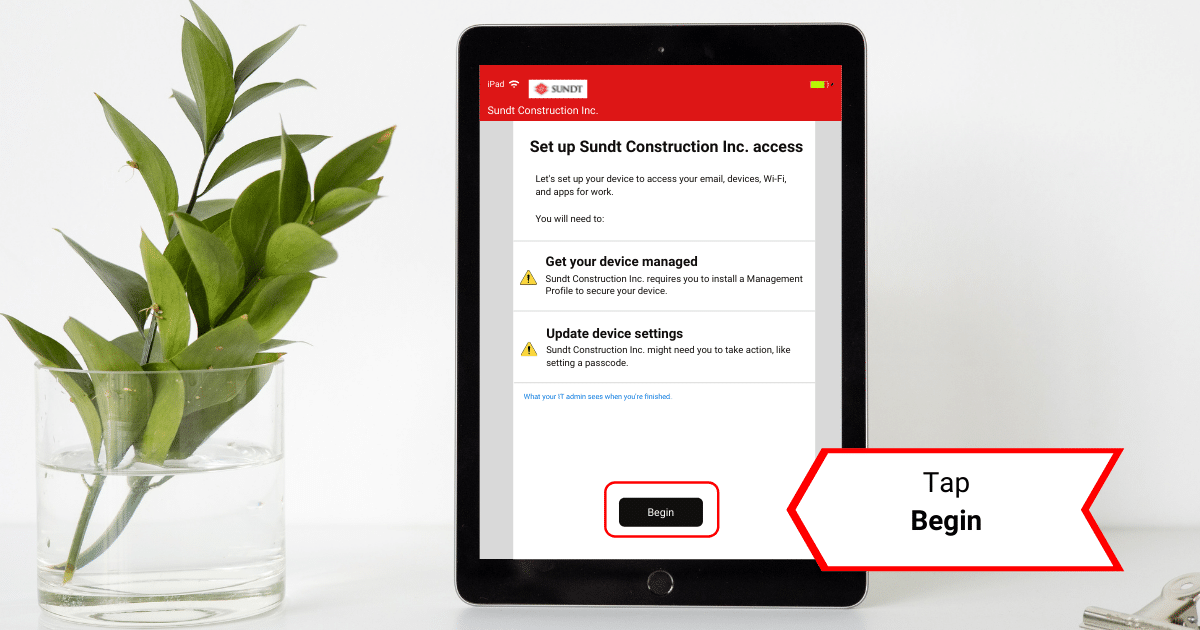
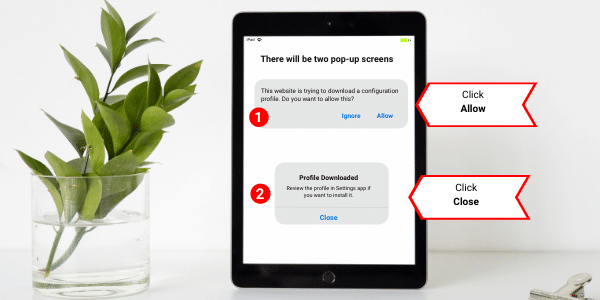
14. The device will begin downloading the required profiles such as the Wi-Fi and email, etc.


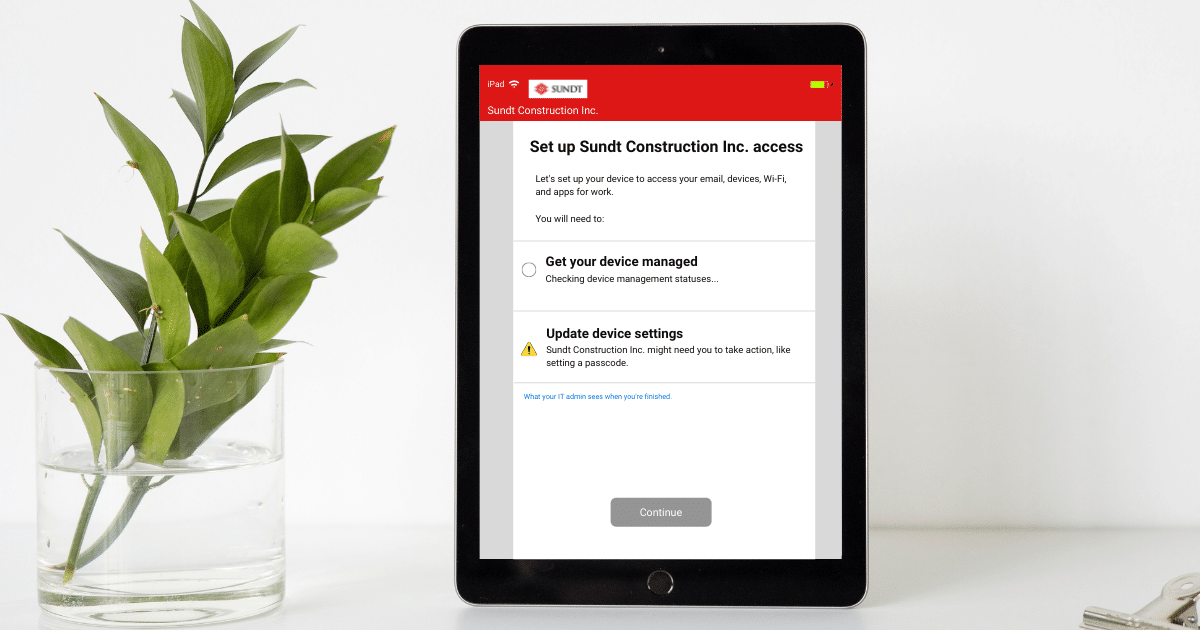
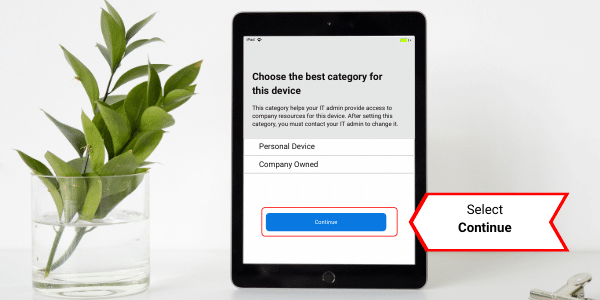
15. For Choose the best category for this device, choose whether an iPhone or iPad, then tap Continue.


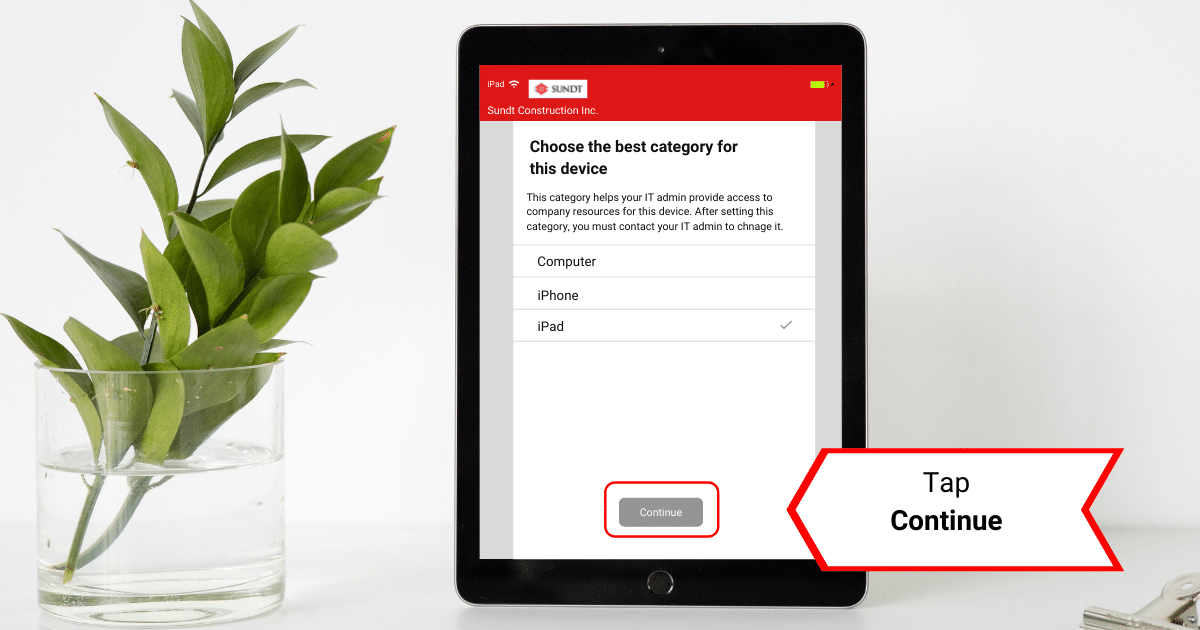
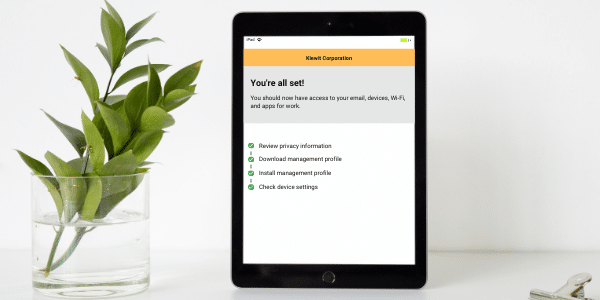
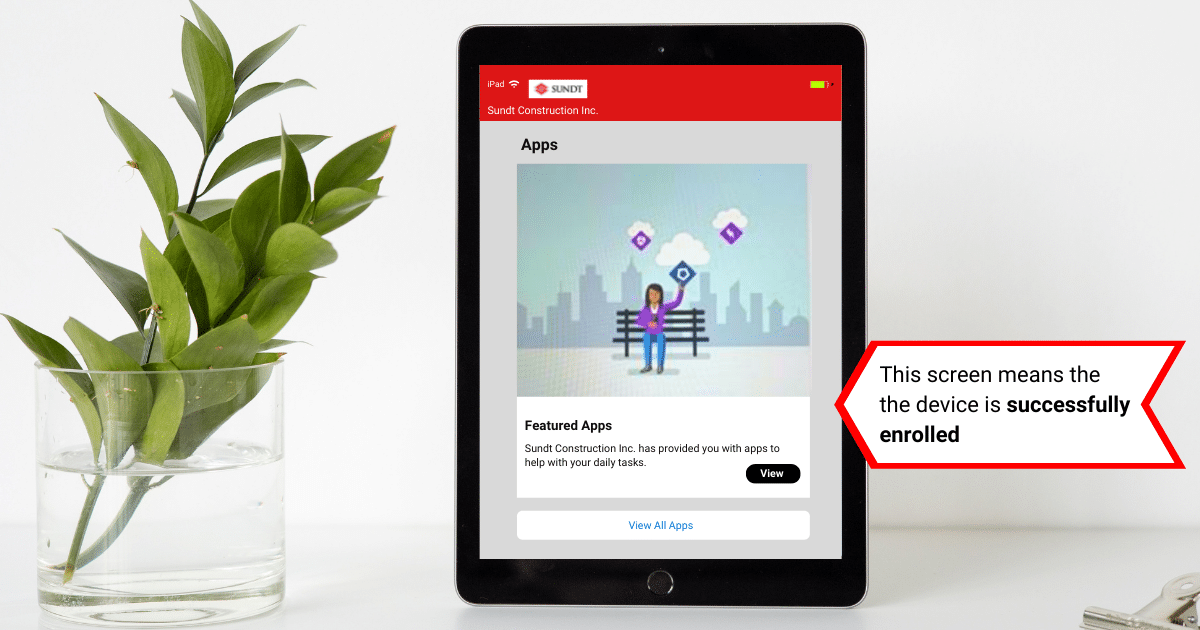
16. If the enrollment is successful, you will see this screen.

If you experience any failures, please contact IT@sundt.com for assistance.


17. Exit the Intune app and go to the Home screen by pressing the Home Button.
Click on the Mail app.


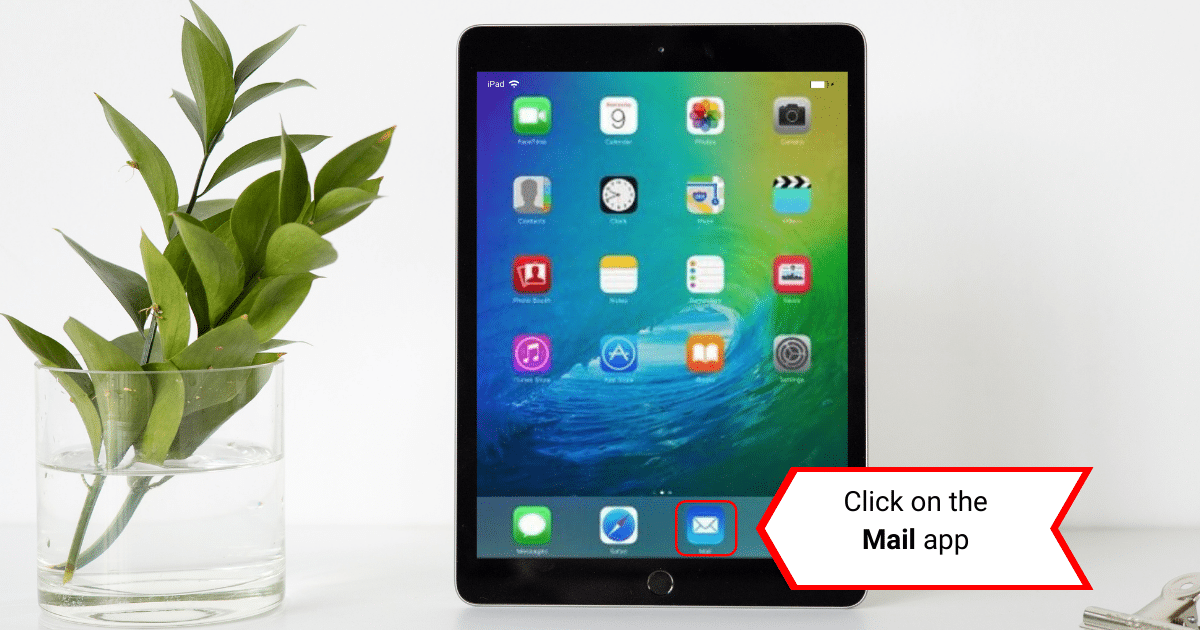
18. For 'Password Required' screen enter the user's Sundt email password, then tap OK. If you experience any other failures, please contact IT@sundt.com for assistance.


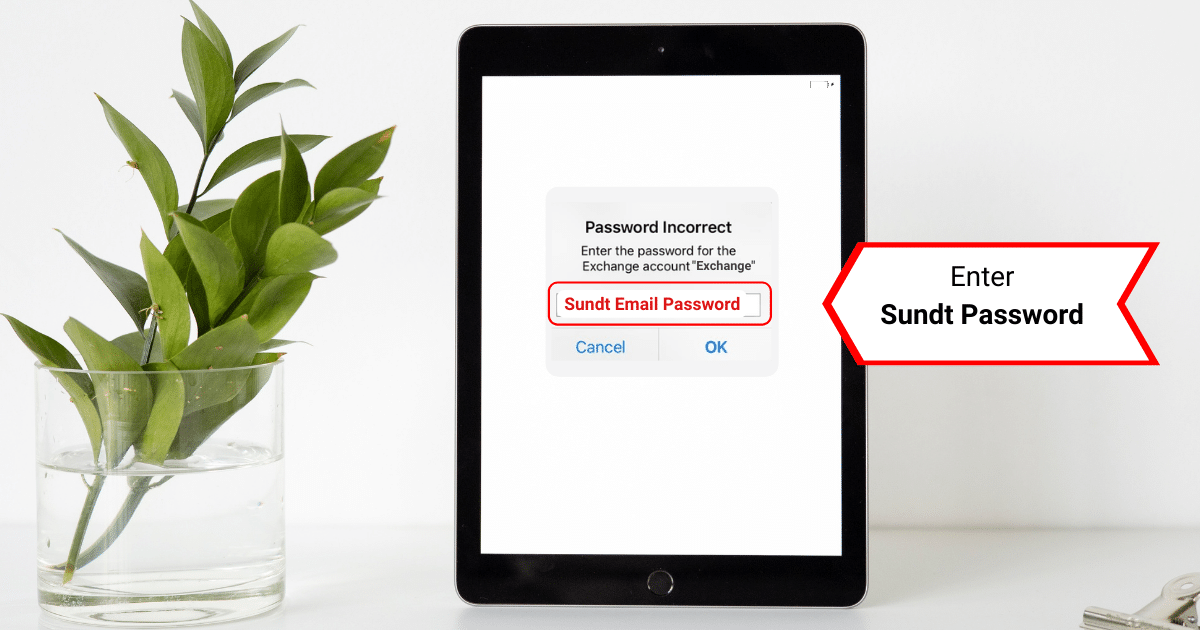
The user’s email should start to download. This process is not always instantaneous and may take a moment. If after a couple of minutes the email does not download, contact IT@sundt.com for assistance.


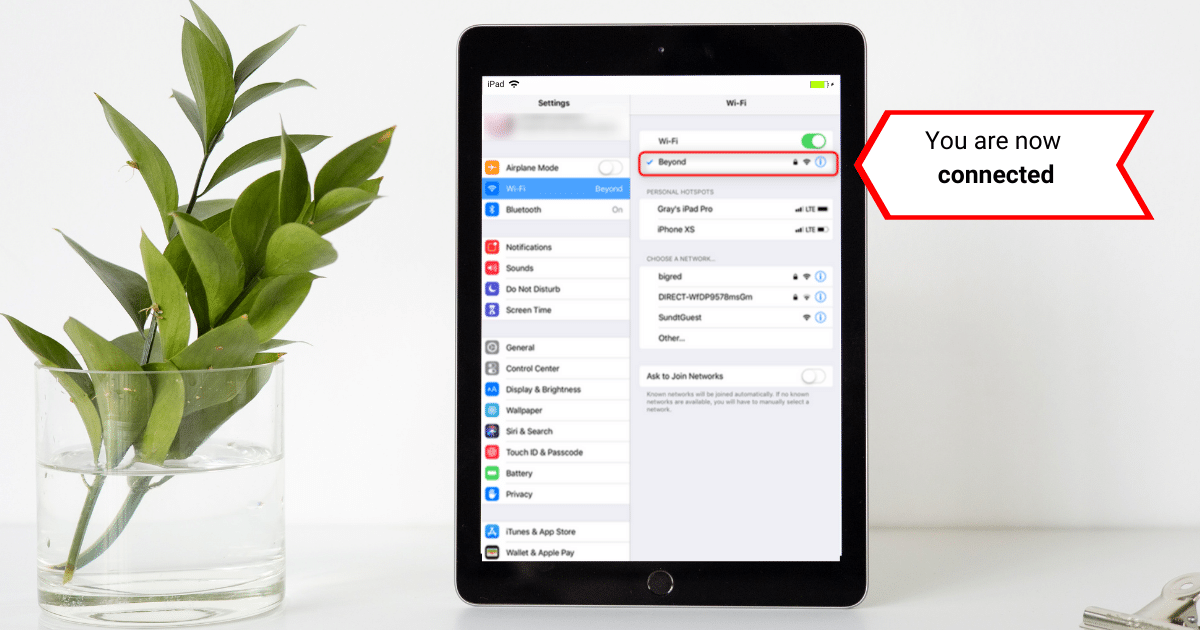
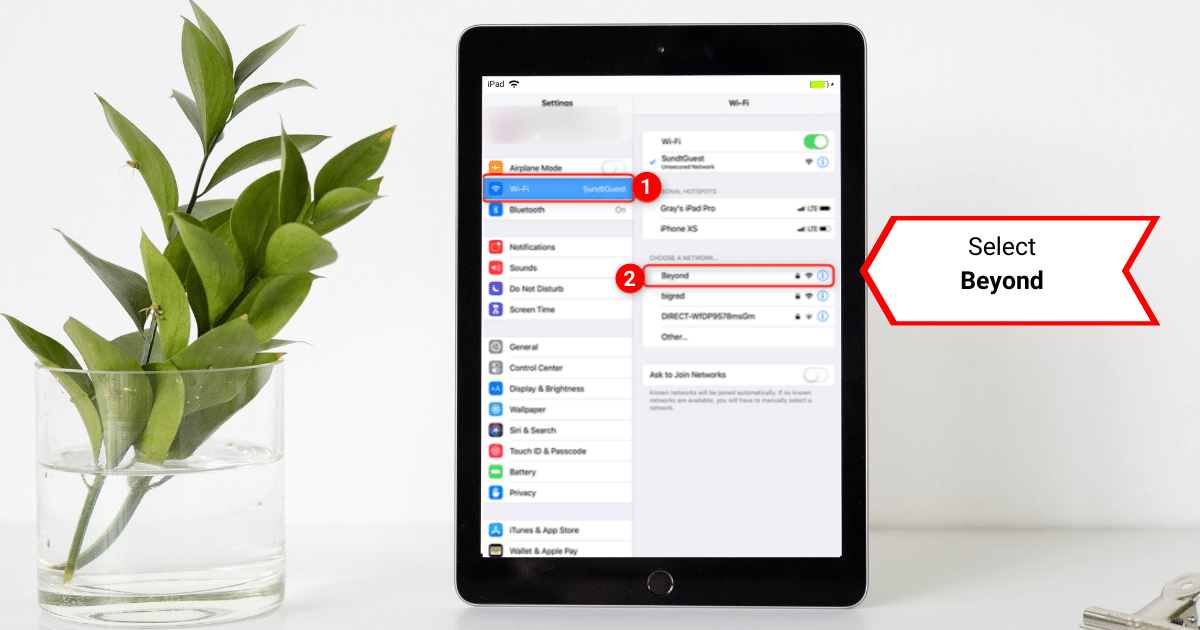
19. To set up Wi-Fi, press the Home Button and click on the Settings icon.


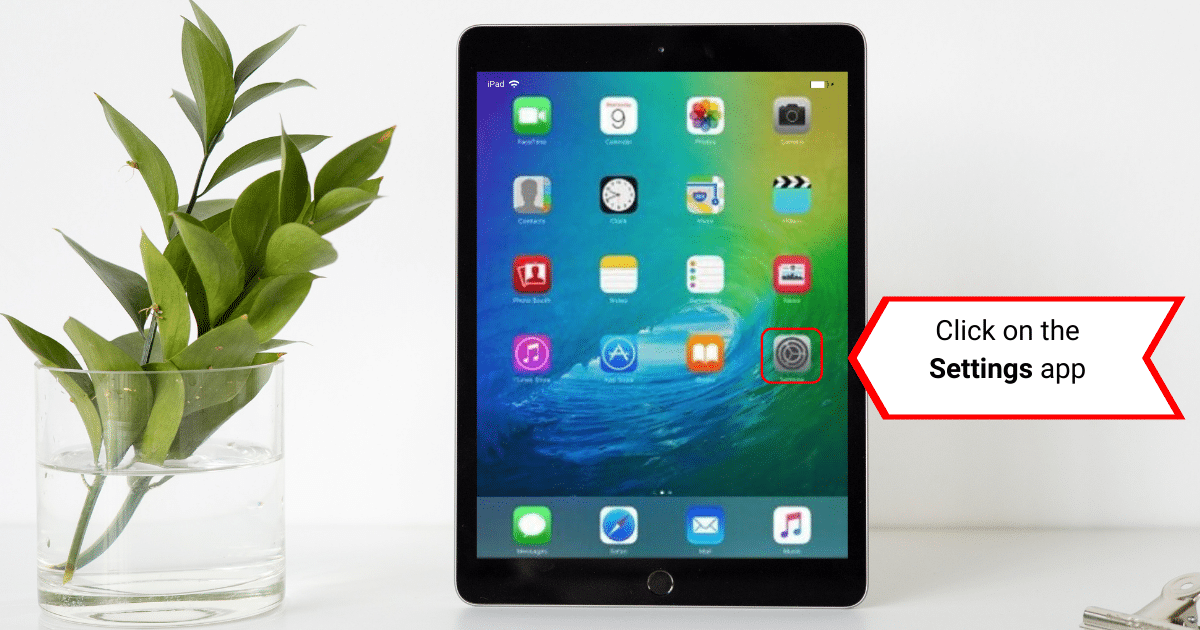
Tap on Wi-Fi, then choose Beyond.


20. Once connected to Beyond, you are set!

Should it fail to connect, try again. If you experience any other failures, please contact IT@sundt.com for assistance.


For technical issues reach out to: IT@sundt.com

How to connect to AT&T Jasper Data

How to Set up Jasper Generic:

From any Home screen, tap the Menu key.
Tap Settings.
If using List view, tap Menu > Tab view.
Tap the Networks tab.
Tap More.
Tap Mobile networks.
Tap Access Point Names.
Tap the Menu key, and then tap New APN.
Verify and update the following settings for the Data APN:
Name: Jasper Data
APN: esquaredinternet.com.attz
Tap Save.
Tap the desired APN profile you want to use. The bullet point fills with green next to the APN profile.

If you are not using an Android device, go to your network settings and update the APN to "esquaredinternet.com.attz"

Kiewit MFA Multi-Factor Authentication Set Up Guide

Follow the steps below to configure your new phone with MFA:
  1. Ensure your new mobile device is upgraded to the latest version. To check, go to Settings > General > Software Update. If there is an upgrade available, click Download and Install.
  2. Download the Microsoft Authenticator app from the app store or from the Kiewit app store.
  3. ON YOUR COMPUTER - Navigate to https://mfa.kiewit.com.
  4. Log in using your Kiewit credentials
  5. Wait approximately 1 minute before the Login failed screen appears. Click the Call me at XXXX link to have the system call you. If your number has changed, click the Answer security questions link to authenticate into the website
  6. Once authenticated, select Activate Mobile App
  7. Click on Deactivate next to your device name. You will be asked to permanently deactivate the device. Click OK.
  8. Click on Generate Activation Code
  9. This screen will appear on your computer. Leave this screen open and open up the Microsoft Authenticator App.
  10. Open the Authenticator App and add a new authentication method by clicking the + sign in the upper right corner, or by Clicking Add account in the main screen.
  11. Select the Add Work or School Account.
  12. Use your mobile device to take a picture of the QR Code on your computer screen.
  13. After your mobile device captures the QR Code, the new device is ready for MFA. Click the Log Out button in the upper right hand corner of the MFA portal webpage.

Kiewit Intune - MDM Set Up Guide

An MDM application will improve our ability to configure, manage and support mobile phones and tablets. Installing the MDM, Intune,will not allow Kiewit to invade your privacy. If you need help with this installation please reach out to chat.

You will need to have both your Kiewit email and password as well as your Apple ID email and password handy.


Instructions: 

1. Look for the lntune Company Portal app (see image below), which should already be downloaded to your device.

NOTE
: If you do not see the app, Download and Install the Comp Portal app on your device from the Kiewit App Hub or from the Apple App Store.

2. Perform a "device backup to iCloud" or manually back up any important photos/contacts.

NOTE: Using iTunes to back up or restore a device is NOT recommended as the old MDM software, AirWatch information may cause the device to lock and require a full device wipe.


3. Open the Company Portal app and click Sign in.


4. Enter your email and click Next.


5. At the Kiewit sign-in screen, enter your Password and click Sign In.


6. After entering your password, tap the Multi-Factor Authentication option and Continue to authenticate with MFA.

7. After signing in, the Company Portal app will open. Click OK and Allow notifications.


8. Next, check the device for security and download the new device management information. Go to Set up Kiewit Corporation access and click Begin.

9. Click Continue on Device Management and Privacy after reviewing.


10. You should see one green checkmark. Click Continue.

11. A webpage will open to download the management profile (shown below). Click Allow and Close.


12. Click Continue and you will be back in the Company Portal app. Click Continue and follow the instructions it provides to install the management profile.

NOTE: You must manually swap over to the Settings app and install it before continuing in the Company Portal app.


13. When the profile is installed properly, swap back to the Company Portal app ( or re-open it) and it should proceed automatically.

14. Select the device category and click Continue. Most devices will be considered "Company Owned."


15. You should now see all green checkmarks. Click Continue to view the Company Portal app.


This completes setting up lntune on your company device.

NOTE: Any Kiewit approved or licensed apps can be found in the Company Portal app, instead of a separate 'App Hub' on your device.

To download or install any company apps, browse the categories in Company Portal or click View all apps for the full catalog.


If you have any questions or issues regarding Microsoft lntune / the Company Portal app, please reach out for support. Call us at (877) 772-7707 option 2 or start a chat.

Monday - Friday: 6 AM to 8 PM CST, Saturday: 6 AM to 3 PM CST

Kiewit Device Activation and Set Up Guide

Below you will find instructions on how to set-up your new company-issued device. Please make sure you havyour Kiewit username (email) and password available. 

General Device Activation and Set Up

Below you will find instructions on how to set-up your new company-issued device. Please make sure you have your company username (email) and password handy.

Self Help: Seedstock Ready

Using and Navigating an MTM Billing Analytics Report

Want to download your data? Click here for directions.

Logging into the eSquared Customer Portal

1. Go to http://www.e2cc.com/ and click on login

2. Enter email address, followed by username and password. If you are having difficulties logging in please see the following link for help: https://kb.e2cc.com/knowledge-base/esquared-customer-portal-password-reset/

3. Once in the customer portal, click on the Billing Analytics button to get to the analytics section

4. Once there click on the file to load (note in most cases you will see one file, if multiples exist they will be labeled with which division the report is for: WMS,TMS or MTM)

All Billing Tabs will have a few common pieces.

Clicking on any of the tabs will take you to the corresponding report page or pop-up menu.

Filter Pop-up Menu:

Clicking on the Filter icon on any tab will display the filter menu, this allows you to focus data on a specific time period, device type, or carrier. Clicking on the menu again, will cause the menu to close.


Each tab will have different graphs and tables but most interactions between data and their tools are common throughout the report.

Filtering

While you can filter data using the Filter Pop-Out, you can also filter data interactively throughout the report, by utilizing different visualization's elements.

Example:

Let's filter MB Used Over Time by a specific user.


Note: All visualizations that are capable to be filtered by that user on the report would be until clearing out the search bar to reset the temporary filter.


Downloading Data

In some cases, you may want to extract or download the data used in the billing analytics display.