Network Connectivity Troubleshooting Guide (iOS)
1. Go to http://www.e2cc.com/ and click on login
2. Enter email address, followed by username and password. If you are having difficulties logging in please see the following link for help: https://kb.e2cc.com/knowledge-base/esquared-customer-portal-password-reset/
3. Once in the customer portal, click on the Billing Analytics button to get to the analytics section

4. Once there click on the file to load (note in most cases you will see one file, if multiples exist they will be labeled with which division the report is for: WMS,TMS or MTM)
All Billing Tabs will have a few common pieces.
Clicking on any of the tabs will take you to the corresponding report page or pop-up menu.

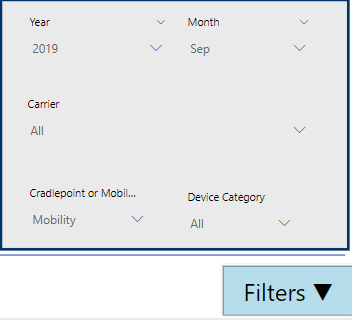
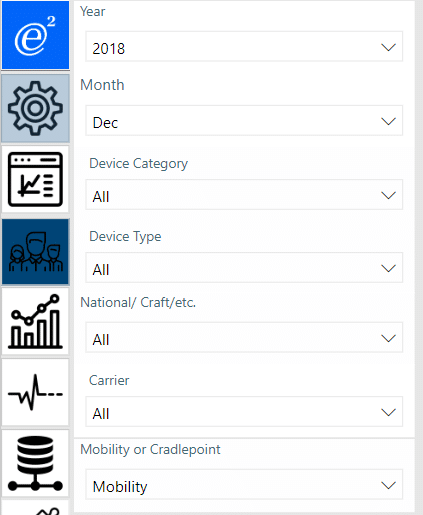
Clicking on the Filter icon on any tab will display the filter menu, this allows you to focus data on a specific time period, device type, or carrier. Clicking on the menu again, will cause the menu to close.
Each tab will have different graphs and tables but most interactions between data and their tools are common throughout the report.
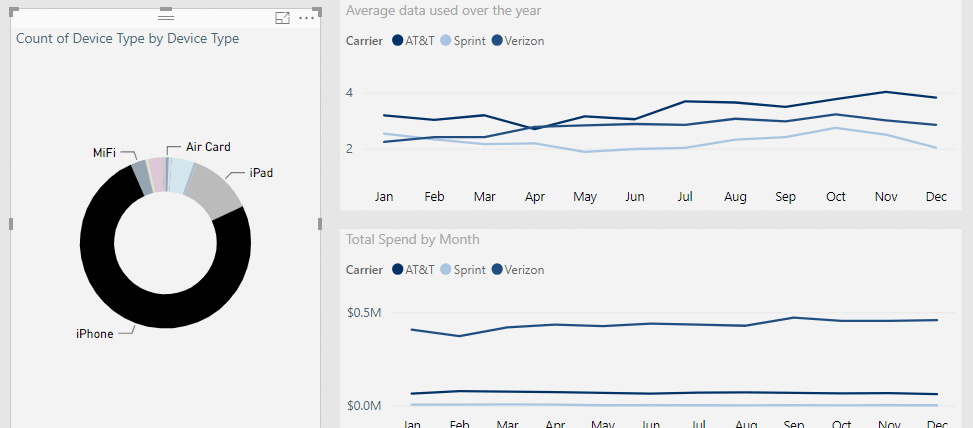
While you can filter data using the Filter Pop-Out, you can also filter data interactively throughout the report, by utilizing different visualization's elements.
Let's filter Total Data Usage by iPhones.
![]()
![]()
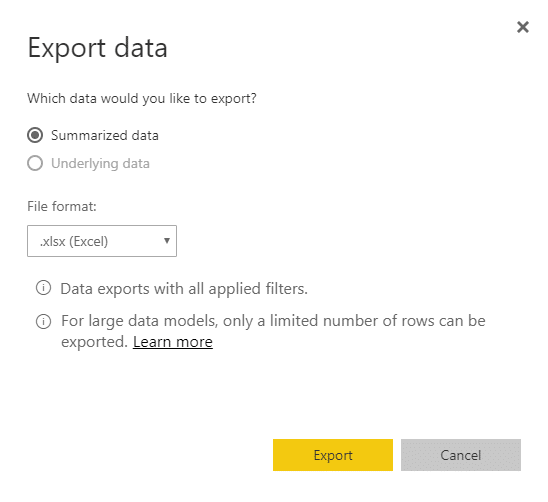
In some cases, you may want to extract or download the data used in the billing analytics display.
Please see below for some helpful links and guides. If you aren't finding what you need, please reach out to service-request@e2cc.com
Links
https://kb.e2cc.com/knowledge-base/using-and-navigating-a-billing-analytics-report/
https://kb.e2cc.com/downloading-data-from-your-billing-analytics-report/
1. Go to http://www.e2cc.com/ and click on login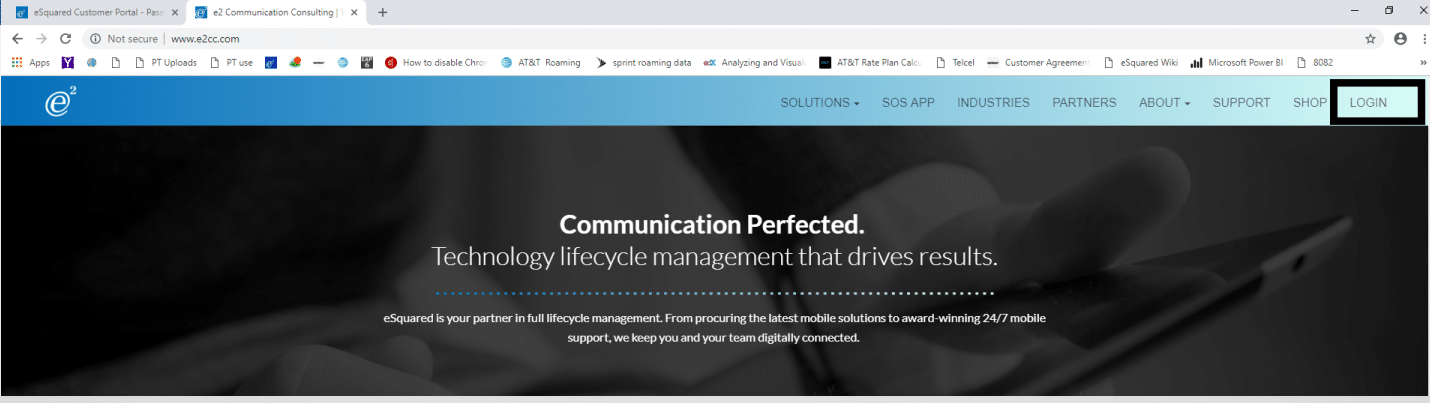

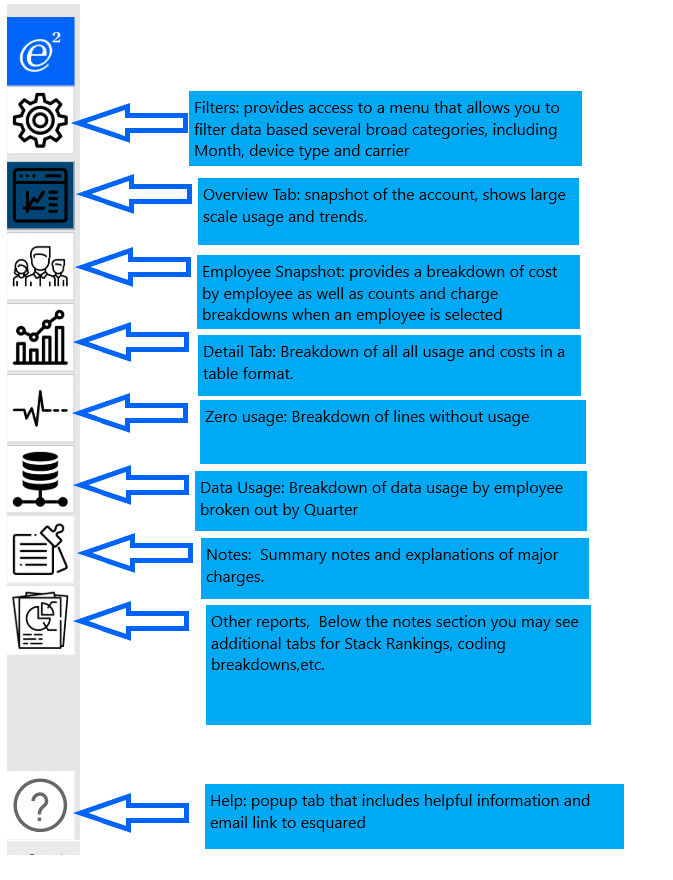
All Billing Tabs will have a few common pieces
Clicking on any of the icons (barring the company logo) will take you the corresponding page or pop-up menu.
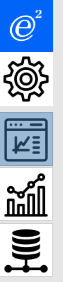

Icons in blue convey what tab a user is on.

Clicking on the gear icon on any tab will display the filter menu, this allows you to focus data on a specific time period. Clicking on the gear again, will cause the menu to close,
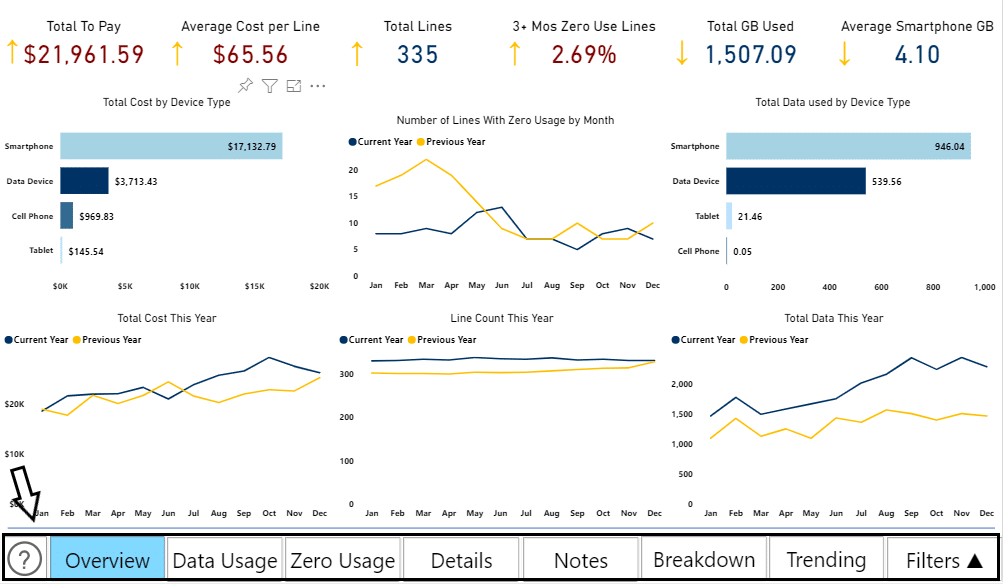
 Snapshot view of the health of the account, provides charts and high-level view of the account.
 Provides a breakdown of each line, similiar to the detail tab on the historic excel based reporting.
 Provides a breakdown focusing on data used.
Click on the “?” icon will cause the user to leave to the knowledge base website which includes this guide,
Each tab will have different graphs and tables but a most interactions and tools are common
Filtering via Graph or table
While the filter pop-up menu allows you to filter data, you can also filter data via navigation of the different charts and tables on a tab.
For Example:
If we click the section, showing the iPhone Device count on the Graph

Then the Total spend and data usage charts to the left of the graph will now only show the costs and usage for your iPhones:
In some cases, you may want to extract or download the data used in the billing analytics display.
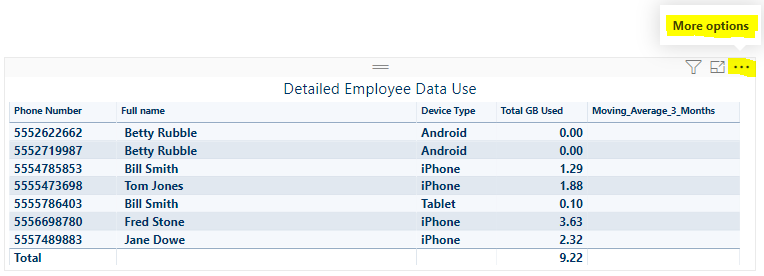
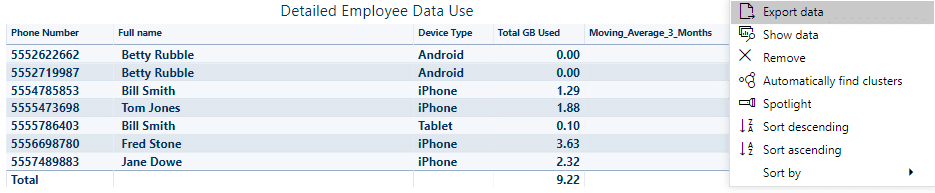
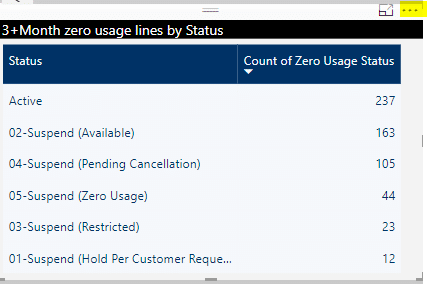
On any chart or graph, you may click on “…” to access the more options menu (highlighted yellow below)
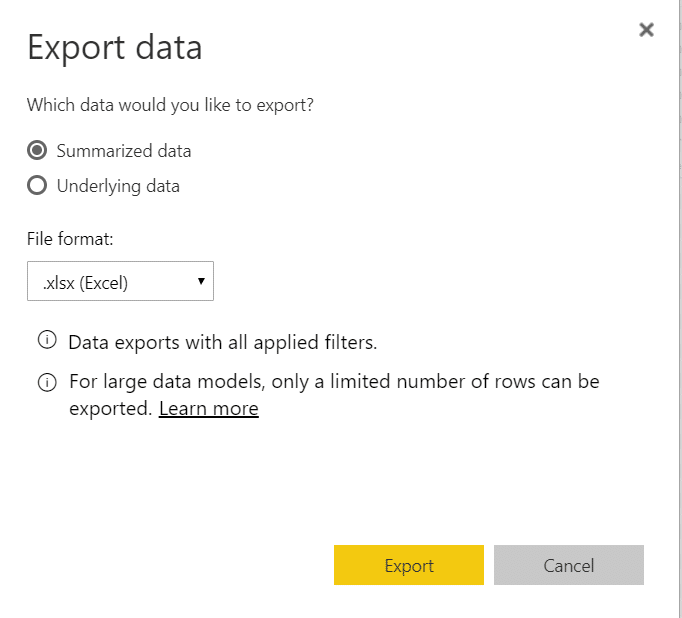
The first option will be to export data

This will take you to a menu allowing to download just the data shown or all of the data attached to the chart.
Mobile Hotspot Troubleshooting with Computer Network resets
Enabling Mobile Hotspot iOS:
Note: Wi-Fi must be turned off to enable Personal Hotspot.
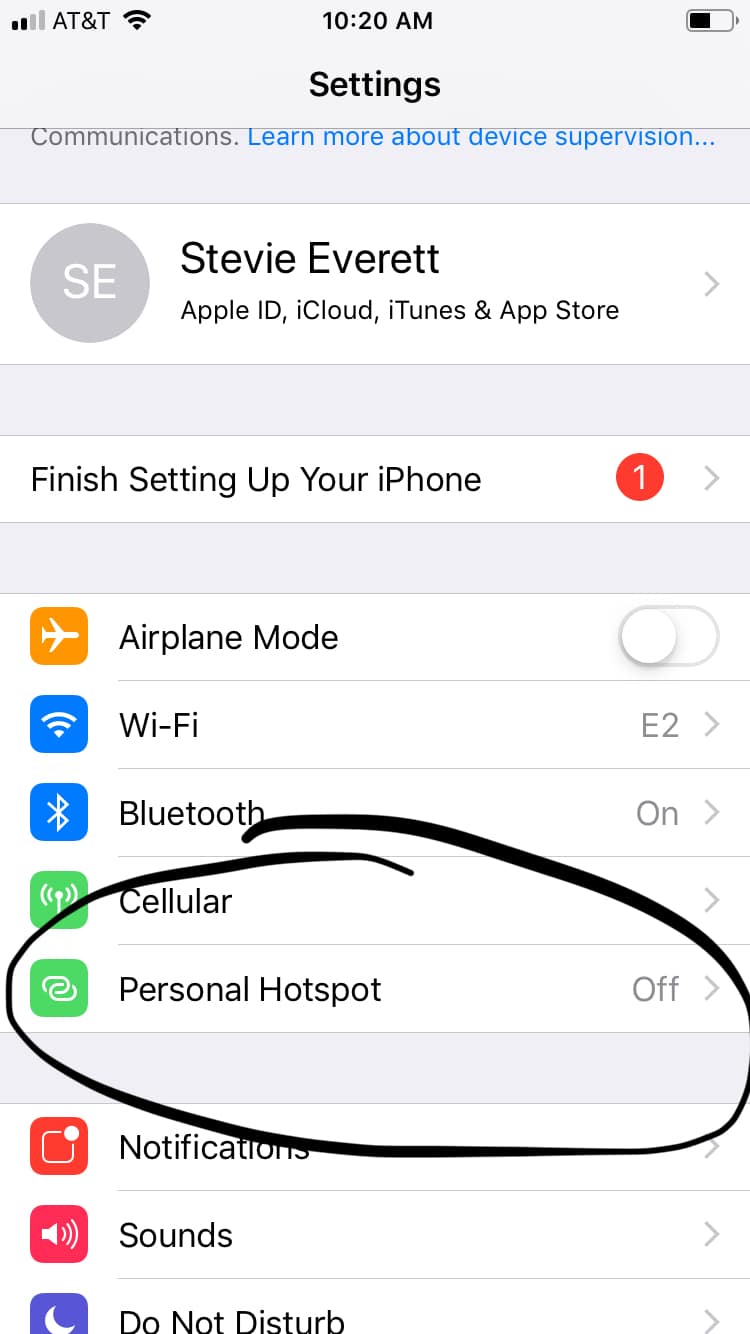
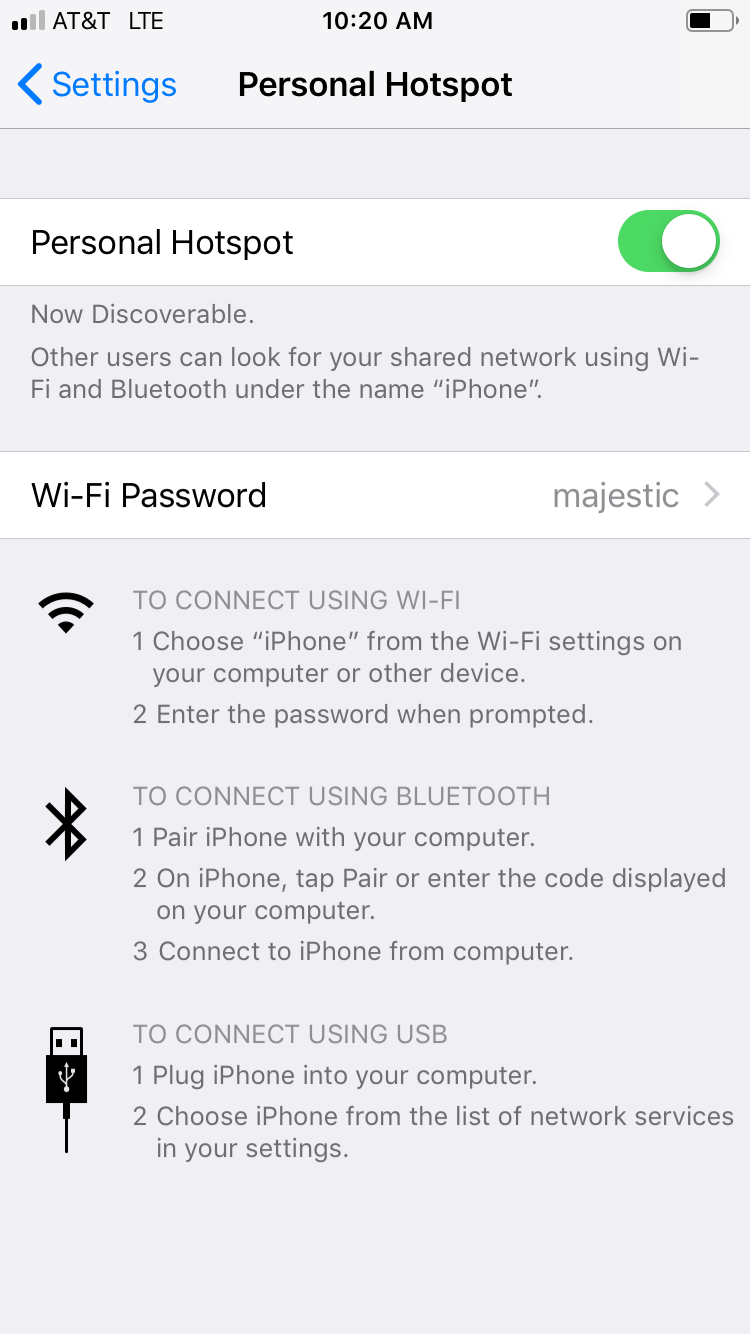
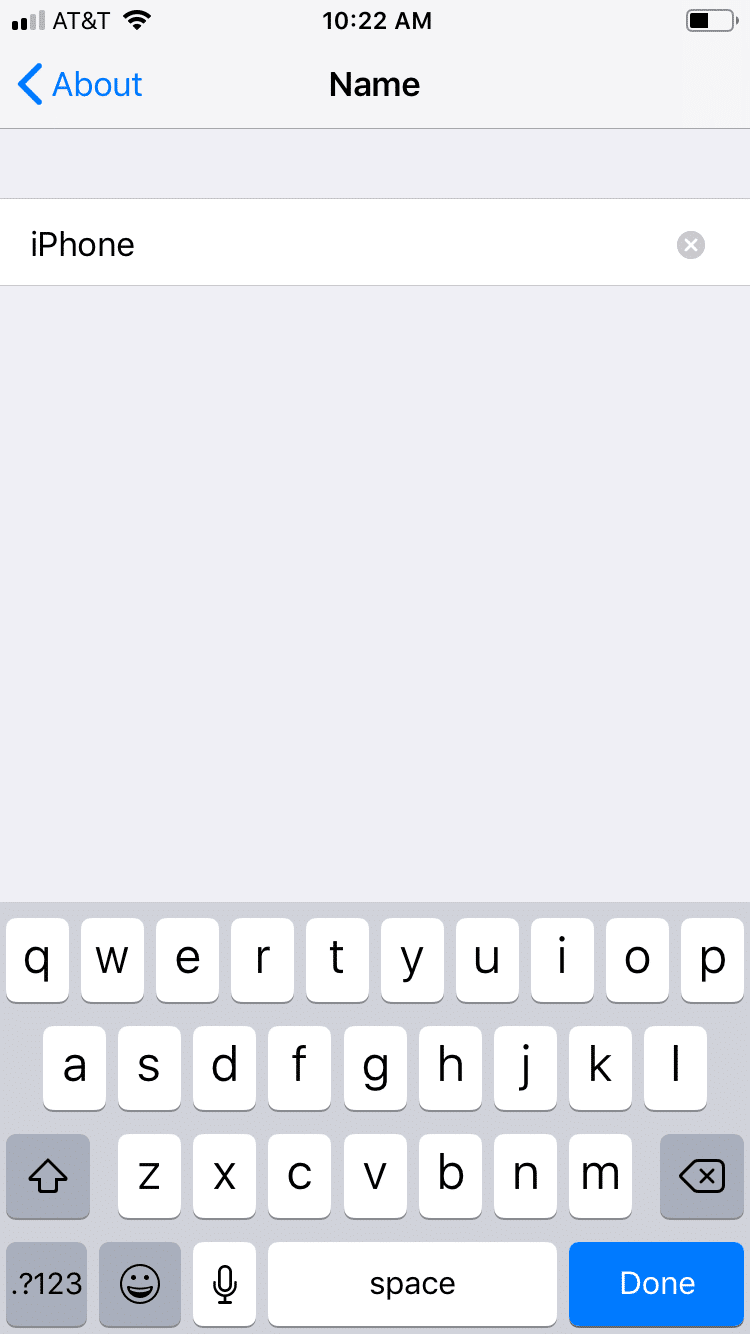
Note: The Personal Hotspot network name is the same name as your iPhone.
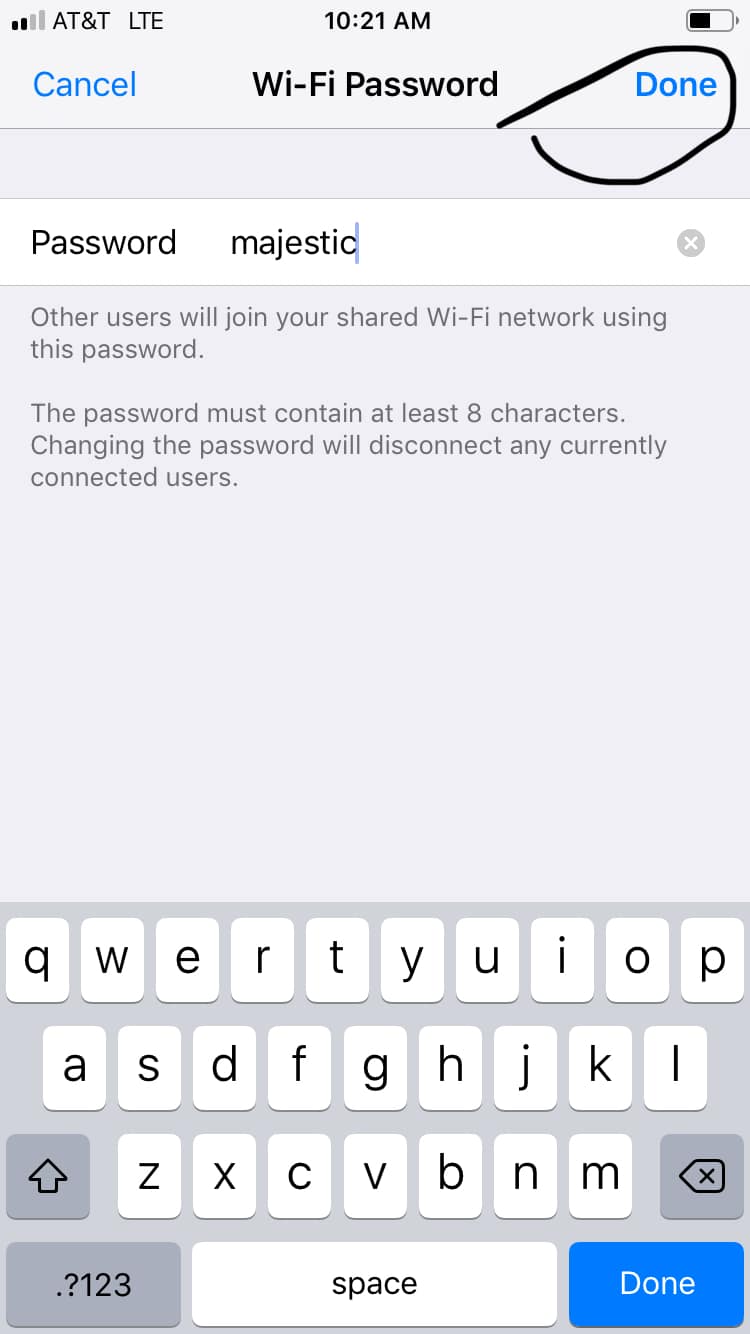
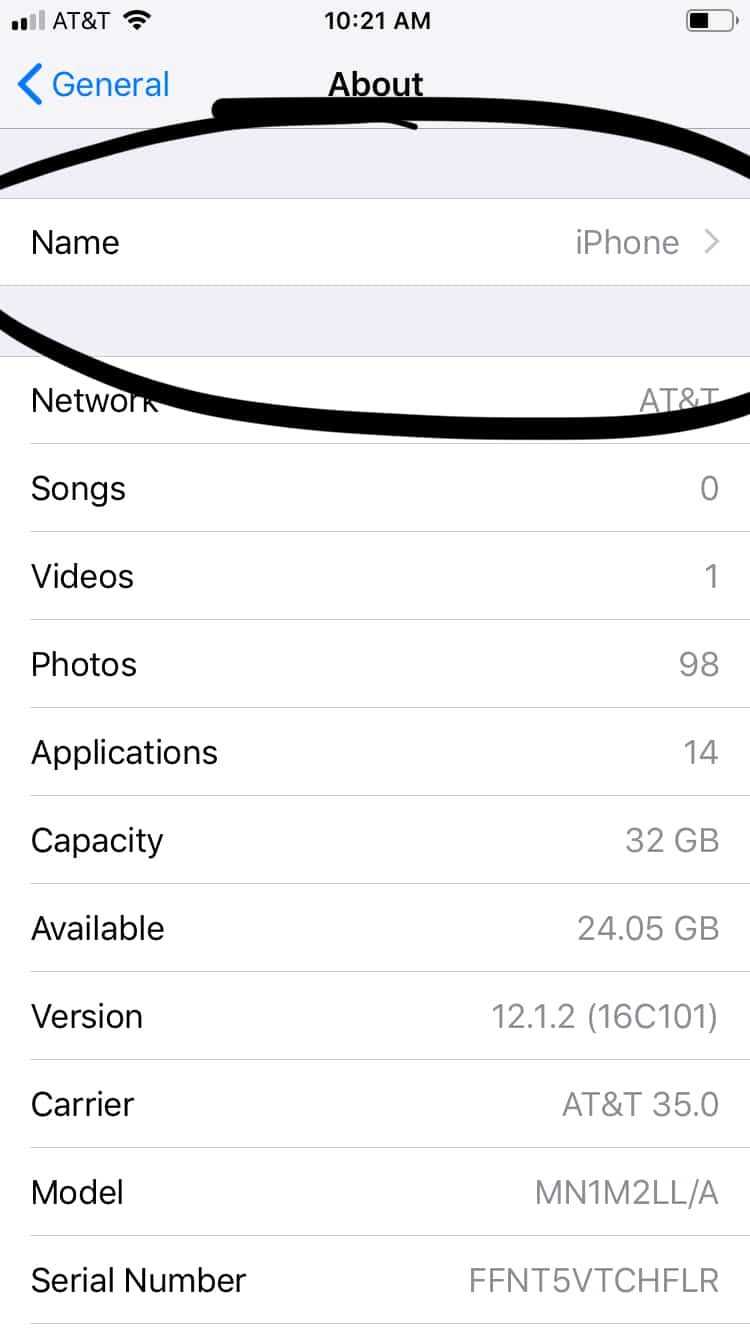
Note: To change the network name, from the home screen, select the Settings app > scroll to and select General > select About > Name. Rename your device using the on-screen keyboard, then select Done.
Troubleshooting on iOS via Network Reset:
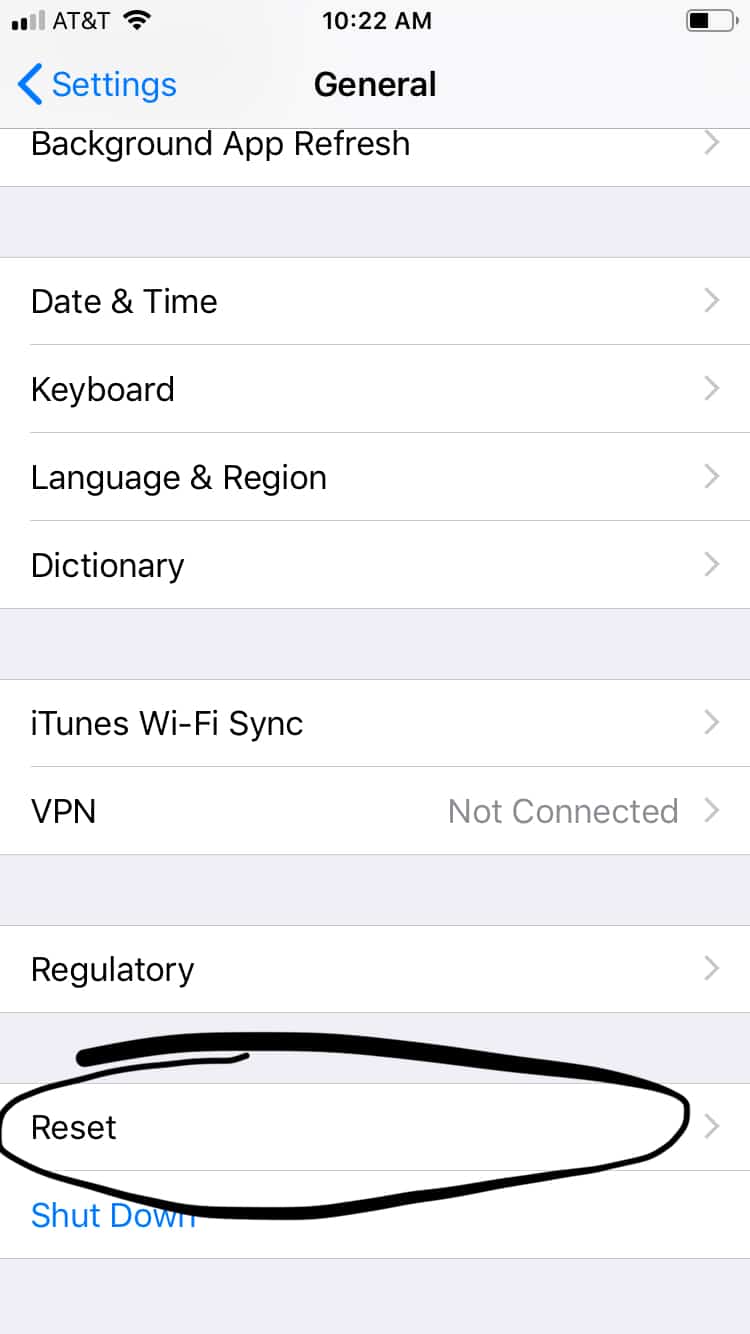
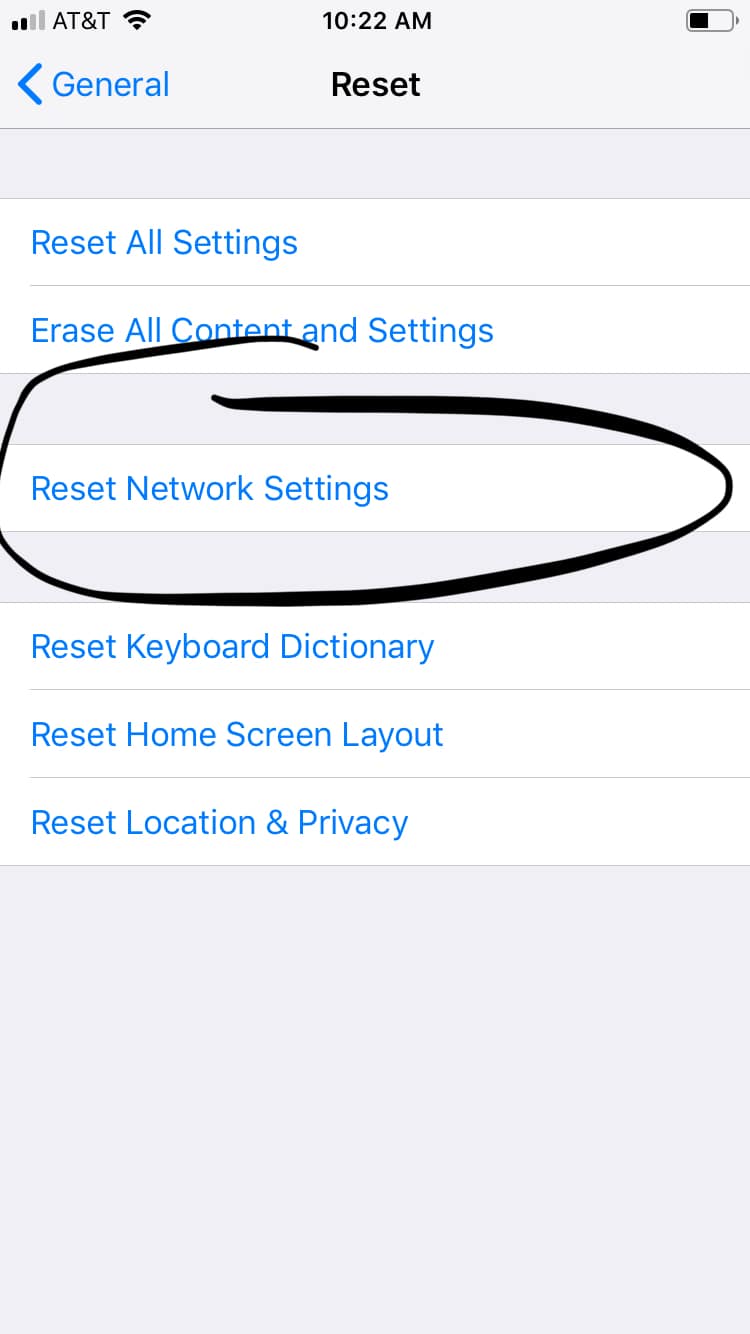
Note: You will then see the Apple logo and your phone will restart and try to reconnect to the network.
Enabling Mobile Hotspot Android:
Note: Tethering & Mobile Hotspot item might be found on the main settings app screen.
Troubleshooting on Android via Network Reset:
Note: If prompted, enter your PIN, password or pattern.
Forgetting Wi-Fi connection on PC:
*This may vary based off PC version and operating system
Windows 10:
Forgetting Wi-Fi connection on Mac:
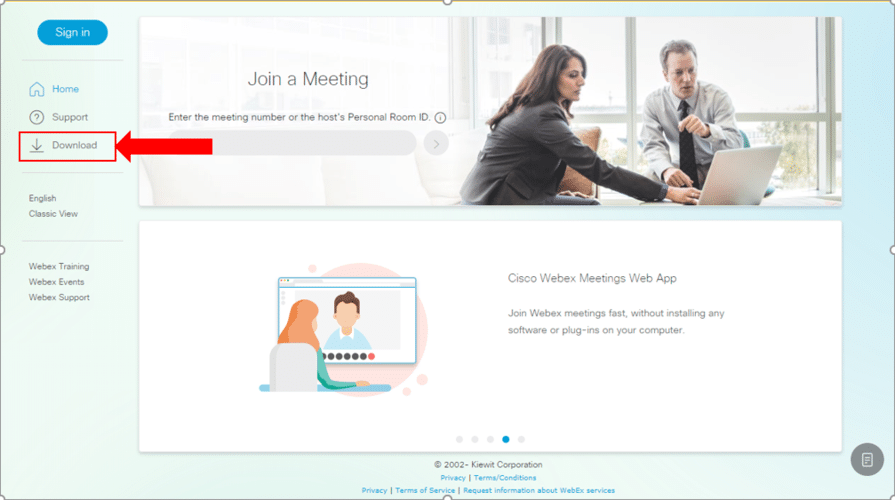
To access your personal room, go to: https://kiewitcorp.webex.com
To access your WebEx account, enter your WebEx username and WebEx password. This is NOT your Kiewit email address
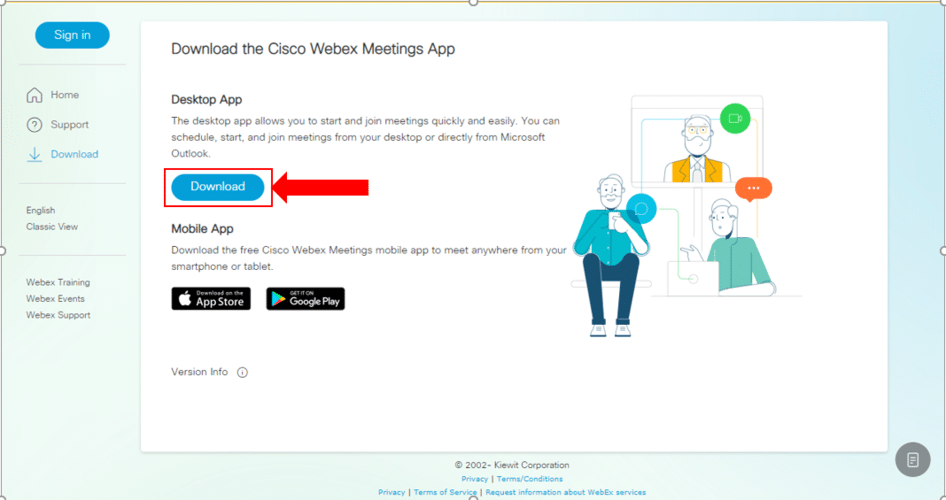
On your first login, you may be prompted to install the WebEx Desktop App. The tools will add a quick meeting button and schedule meeting button to Microsoft Office applications, including Outlook. The WebEx Desktop App is not a requirement.
or
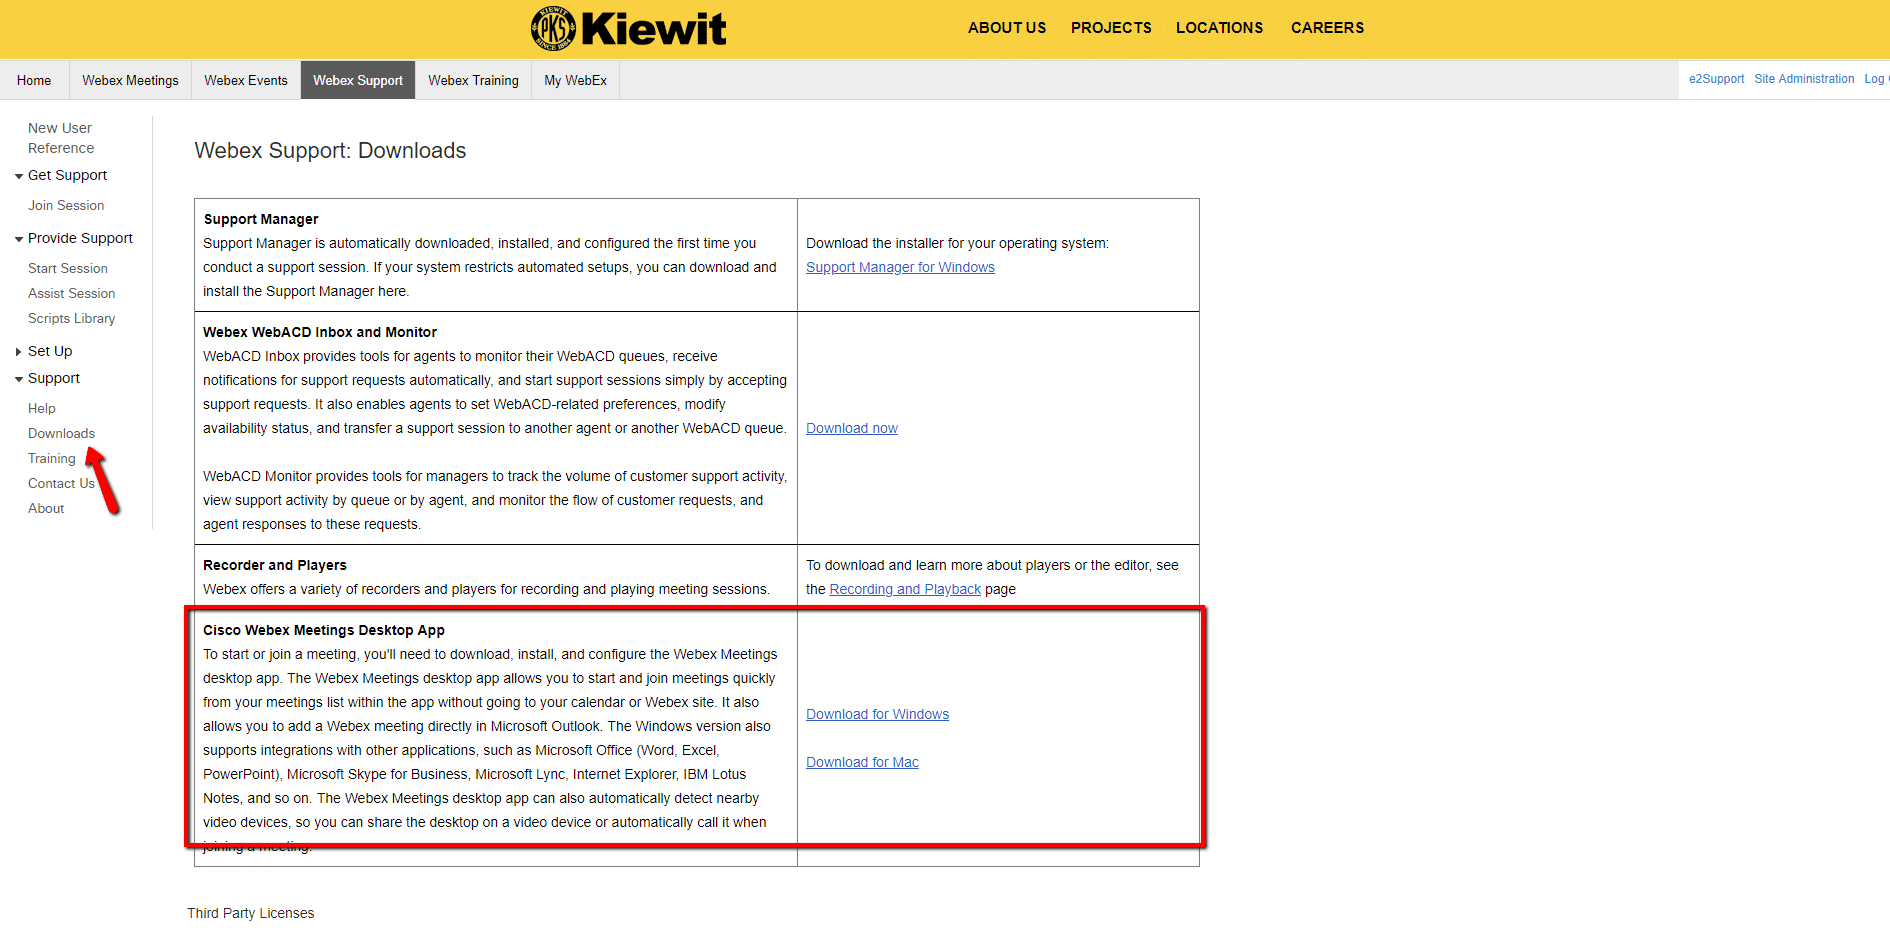
1. In the window that appears, click next

2. Choose "I accept the terms in the license agreement" and click next, then install

3. If prompted, close Outlook. Once install is complete, click Finish


4. Next, it will prompt you to sign in with the Webex account email. Then choose the kiewitcorp.webex URL, then have them enter their password


5. After that, they will be able to access meetings from the desktop app. Outlook add ins will look like the photo below


Let’s start by checking the current health of your battery. If a battery is old or defective, its capacity might be reduced, which will prevent your phone from holding as much charge as it once did.
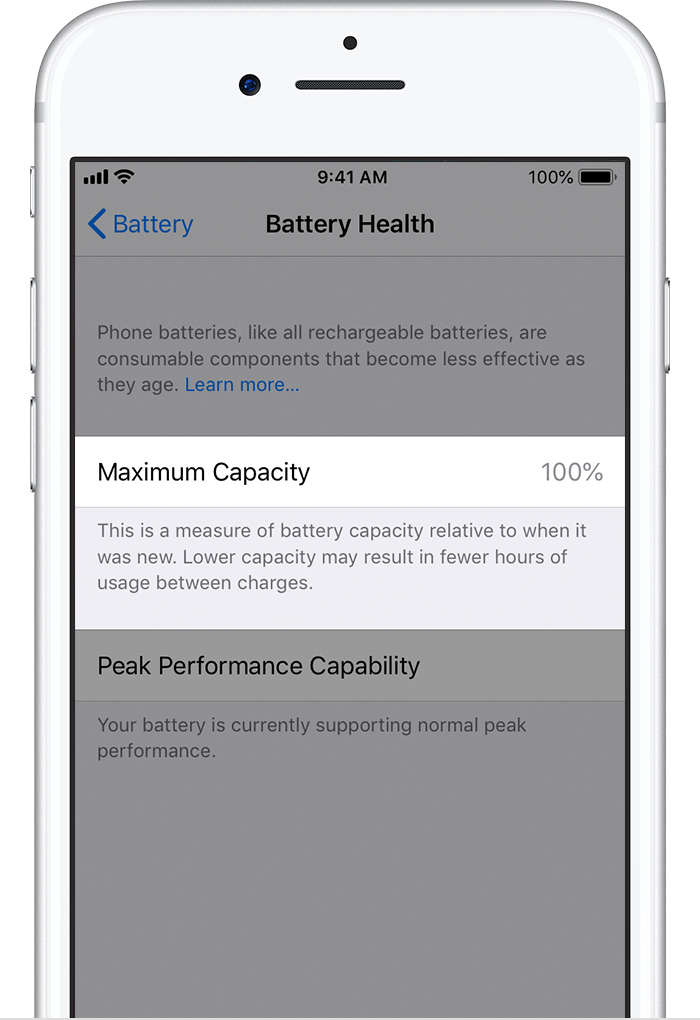
The Maximum Capacity percentage shows the current maximum capacity of the battery compared to when it was new. If this percentage is low, it might be a sign that the battery is defective or might need replacing.
The Peak Performance Capability section will display additional information about the performance of your battery. This is also a useful tool for determining if your battery needs replacing.
These tips can be used to extend the battery life of your iOS device by reducing overall power usage.
This list shows the applications that have been using your battery. Look through this list to see if any applications seem to be using more battery than expected. Next, we will try to close some of these applications so that they are not using your battery while running in the background.
Regularly closing applications will preserve your battery by preventing them from running in the background.
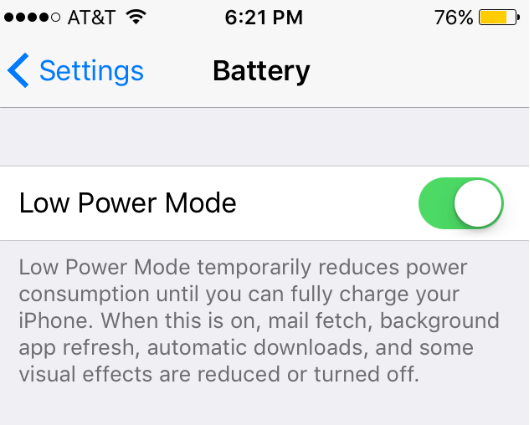
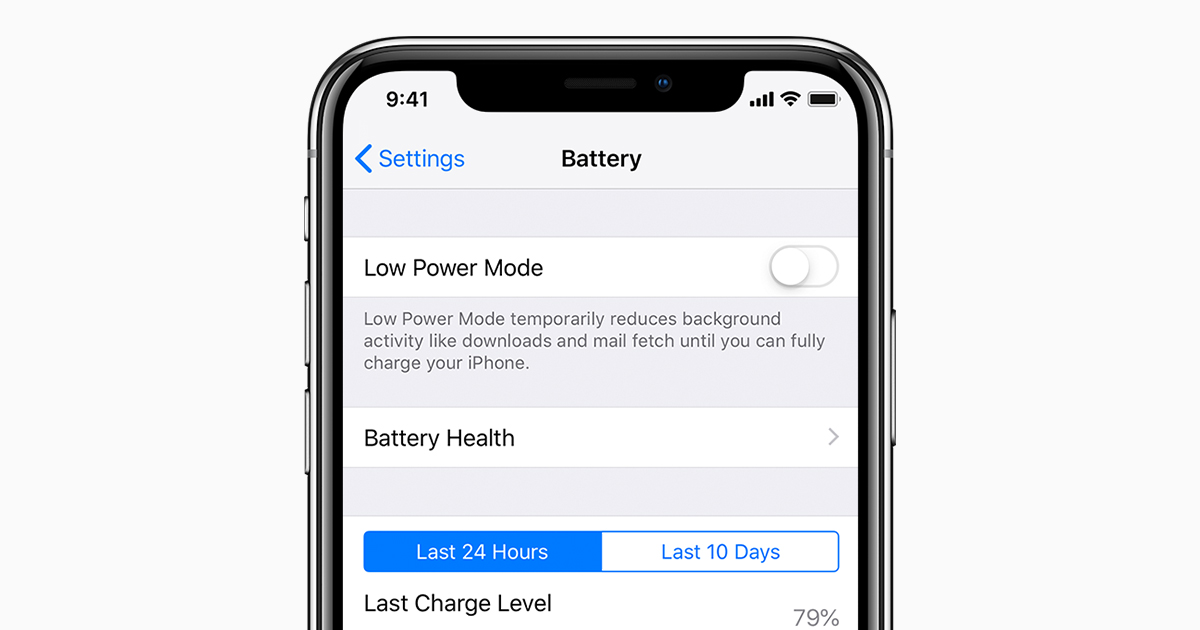
Low Power Mode will preserve your battery life by automatically reducing the brightness of your screen and optimizing device performance.
Disclaimer: When enabled, Low Power Mode will prevent applications from running in the background. This might cause the Mail application to not receive emails until the application is opened.
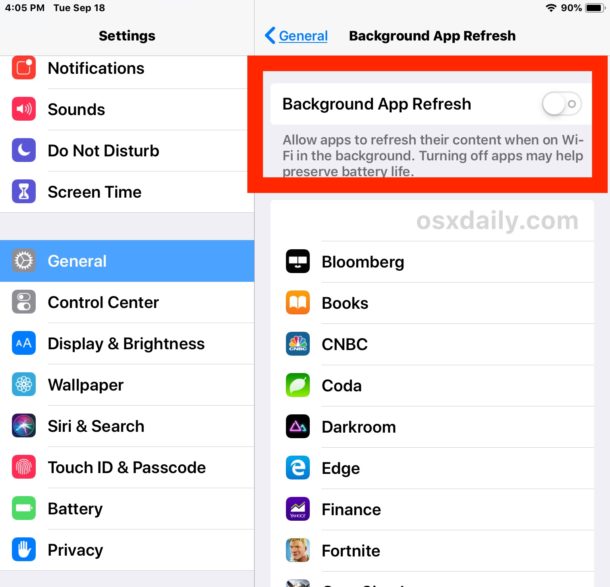
By disabling Background App Refresh, this prevents applications from updating while not being used.
Disclaimer: If you require a certain application to update while not currently being used, you can enable Background App Refresh and disable individual apps.
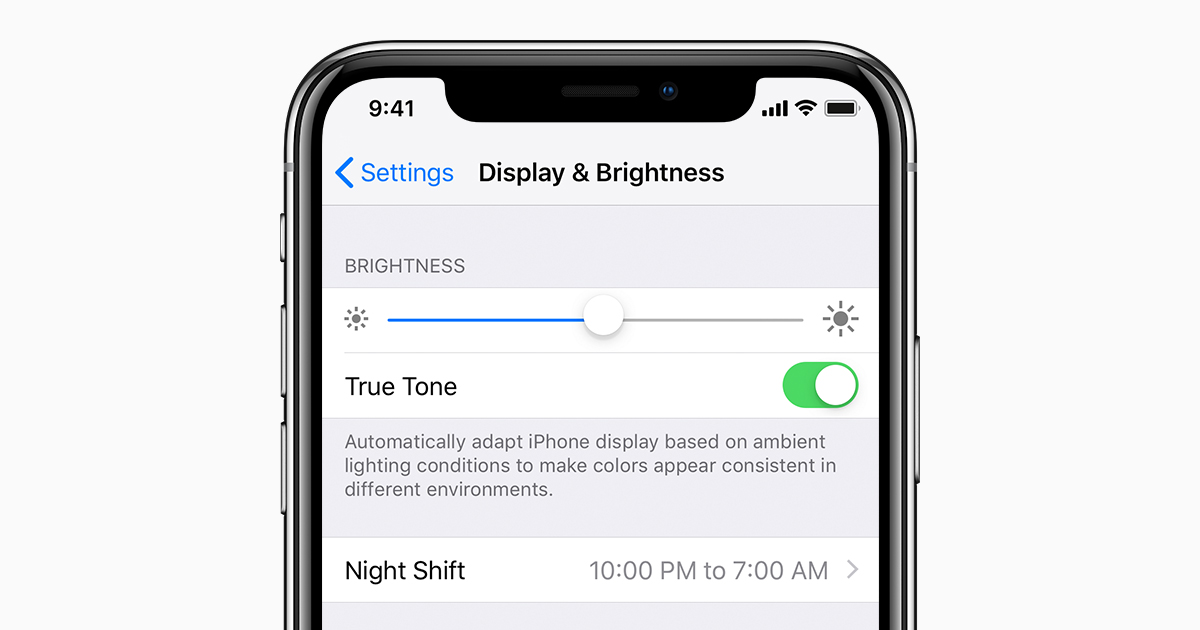
Powering the screen of the phone takes a considerable portion of the battery. This can be reduced by keep the screen brightness down when possible.
If the Apple ID account that is used on your device is the same as the one used on your personal (non-work) device, the devices will constantly try to synchronize information and may cause a drain on battery.
You can check which Apple ID you are logged into on your device by going to Settings and tapping your name at the top of the screen. If this email belongs to your personal Apple ID, we would advise to log out of this account by tapping Sign Out.

We recommend logging into an Apple ID with your work email address.
These tips can be used to extend the battery life of your Android device by reducing overall power usage.

This will reduce your battery usage by turning off your screen quickly, once you are not using it.
Powering the screen of the phone takes a considerable portion of the battery. This can be reduced by keep the screen brightness down when possible.

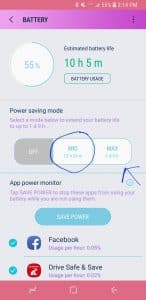
Disclaimer: By turning on Max Power Saving Mode, certain applications might not be allowed to run in the background, preventing them from functioning correctly.
By closing applications that remain open in the background, your phone will use less processing power, which will then lead to saving battery power.
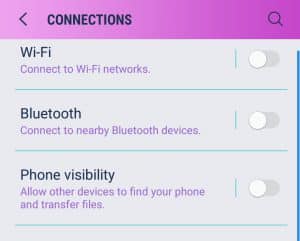
Bluetooth and Mobile Hotspot will drain your battery very quickly as your phone constantly tries to search and try to connect to other nearby devices. Limit the usage of these features to save battery power.
1. Go to http://www.e2cc.com/ and click on login
All Billing Tabs will have a few common pieces
Clicking on any of the icons (barring the company logo) will take you the corresponding page or pop-up menu.
Icons in blue convey what tab a user is on.
Clicking on the gear icon on any tab will display the filter menu, this allows you to focus data on a specific time period, device type or carrier. Clicking on the gear again, will cause the menu to close,
Click on the “?” icon will cause a help menu to be displayed. This menu offers a quick breakdown of the abs available along with a button to email esquared communications.
Each tab will have different graphs and tables but a most interactions and tools are common
Filtering via Graph or table
While the filter pop-up menu allows you to filter data, you can also filter data via navigation of the different charts and tables on a tab.
For Example:
If we click the section, showing the iPhone Device count on the Graph
Then the Total spend and data usage charts to the left of the graph will now only show the costs and usage for your iPhones:
In some cases, you may want to extract or download the data used in the billing analytics display.
On any chart or graph, you may click on “…” to access the more options menu (highlighted yellow below)
The first option will be to export data
This will take you to a menu allowing to download just the data shown or all of the data attached to the chart.
The Detail tab includes two features not seen in any of the other tabs:
Every single line is listed in the matrix
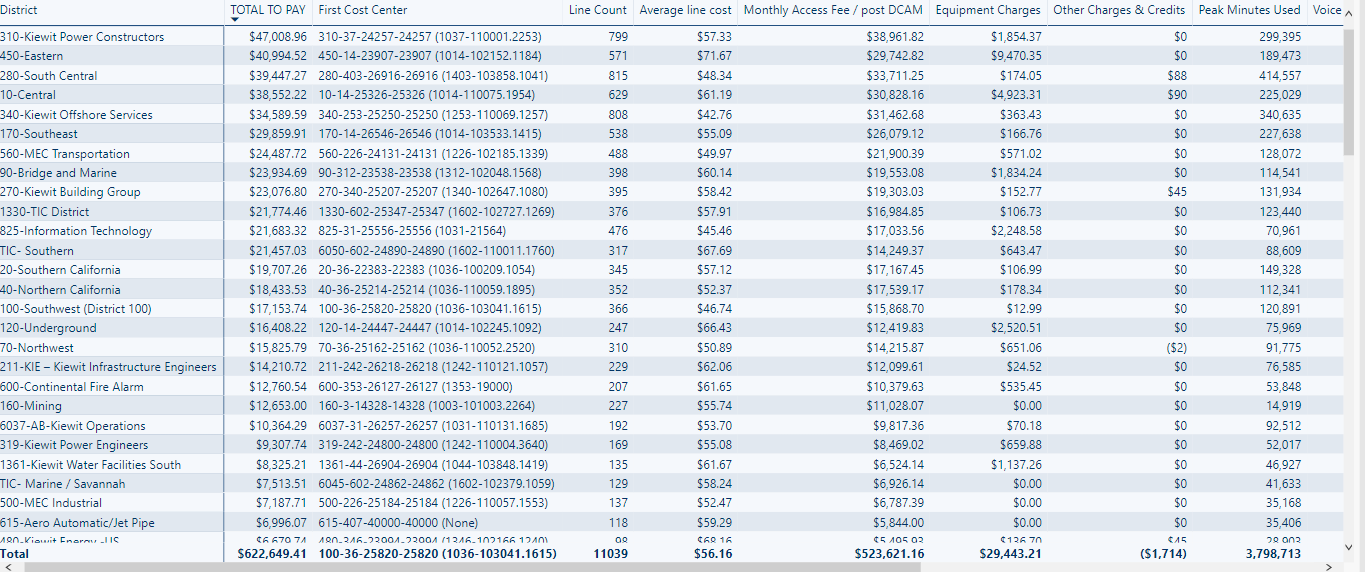
However, in most case the instead of seeing each individual line you will see a top level summary based on the departments.
To navigate these different levels you have a few ways of going about.
![]()
These three buttons allow you to go up and down the levels as needed.
However, say you want to dig deep into only a specific sub-section you can do the following:
Right-click on the row you are interested in, this will give you the following options:
Expand/Collapse: This will allow you to see go down(expand) or up (collapse) in level while still seeing the other hierarchies. You will also have 3 sub-options.
Selection: only go down/up one level of the row you have chosen.
Entire: go down/up one level for all rows
All: Go down/up to the lowest level for all groups
Drill Down/Up: Go down/up one level of the row you have chosen, also all other groups will be hidden.
Cost Code search
The detail tab also includes a cost code search which allows you to search and filter by part of or the entirety of a cost code.
[no_toc]